I’m sure someone is going to try and blast me for talking about OrgMode and then using Vim in the same sentence, because OrgMode is an Emacs thing not a Vim thing and the divide between users of the editors often seems like a holy war. As I said in my article on my issues with TickTick, I love being able to control things from the keyboard and TickTick just isn’t there.
But Vim, really I use NeoVim, is all about keyboard control and OrgMode lets you manage tasks and Nvim OrgMode brings.org file support and syntax to
To install nvim orgmode I added it to my lua configuration and then ran PackerSync. From there it was a matter of creating my first .org file and starting to organize my tasks.
One big reason I’m attracted to Nvim OrgMode is that it will work the exact same way, with the same keyboard commands and same features on both Linux and macOS as it works as NeoVim does on both platforms. Any automation script I write for one platform will just work on another, unlike when I use Shortcuts on Apple’s platforms which lock me into Apple
Org Syntax
Org syntax starts with a * which denotes a heading. Every heading can also be a task if you add TODO to the line.
* This is a heading
* TODO this is now a task
To add a deadline to the task you add DEADLINE below the heading. The following task would be due on November 25 2023.
* TODO this is now a task with a deadline
	DEADLINE: <2023-11-25>
If you want to create a subtask, then use two ** as your sub-heading and you have a subtask.
* TODO this is now a task with a deadline
	DEADLINE: <2023-11-25>
** TODO this is a subtask
You can also take notes under headings to your heart’s content.
* TODO this is now a task with a deadline
	DEADLINE: <2023-11-25>
	- yup I need to take notes here
** TODO this is a subtask
	- I can take further notes here
	- and even link to things like https://curtismchale.ca
As your headings get long you can fold headings in the file to make it more readable. To fold a heading press the TAB key. Given the task above if I folded on my top heading, it would fold all the subtasks and notes up. If I folded on my second level heading, it would only fold up the content that is a child of the second level heading.
We’ll dig more into the options for the syntax of an .org file as we go.
Quick Capture
As I live much of my day in NeoVim it’s also an easy place to capture tasks. I can capture tasks to the refile.org file, which is the default inbox, by pressing <Leader>oc in any vim window. This opens up a buffer that lets me enter the text and then when I press :x the buffer saves and goes away while giving me feedback that my task was saved in the refile.org file for me to re-file later.
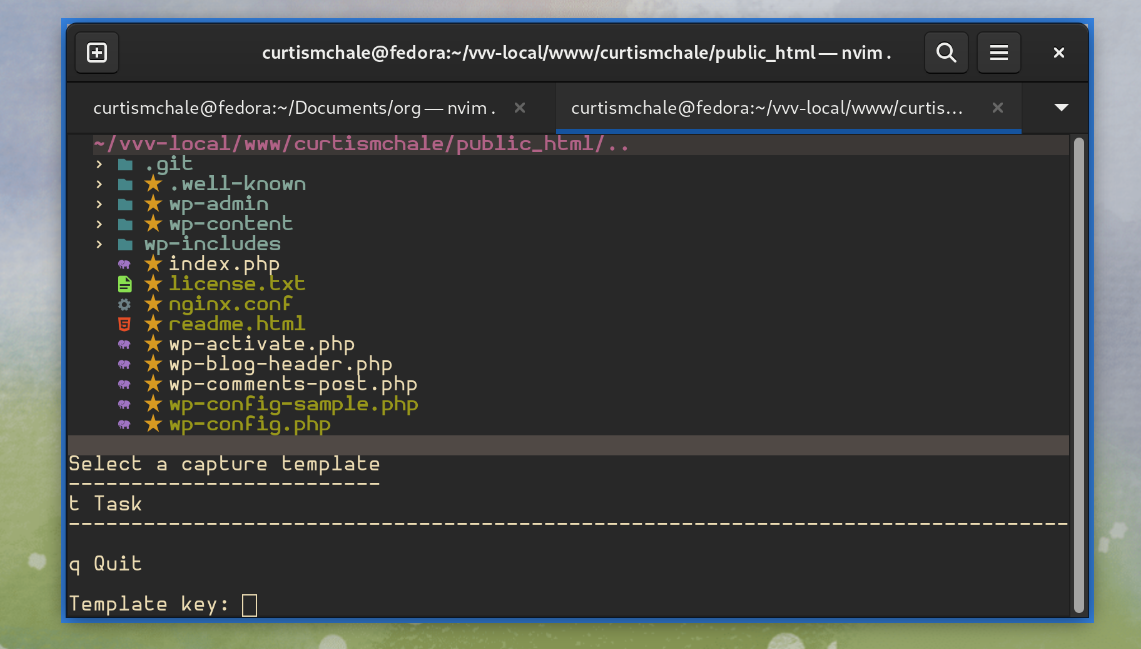
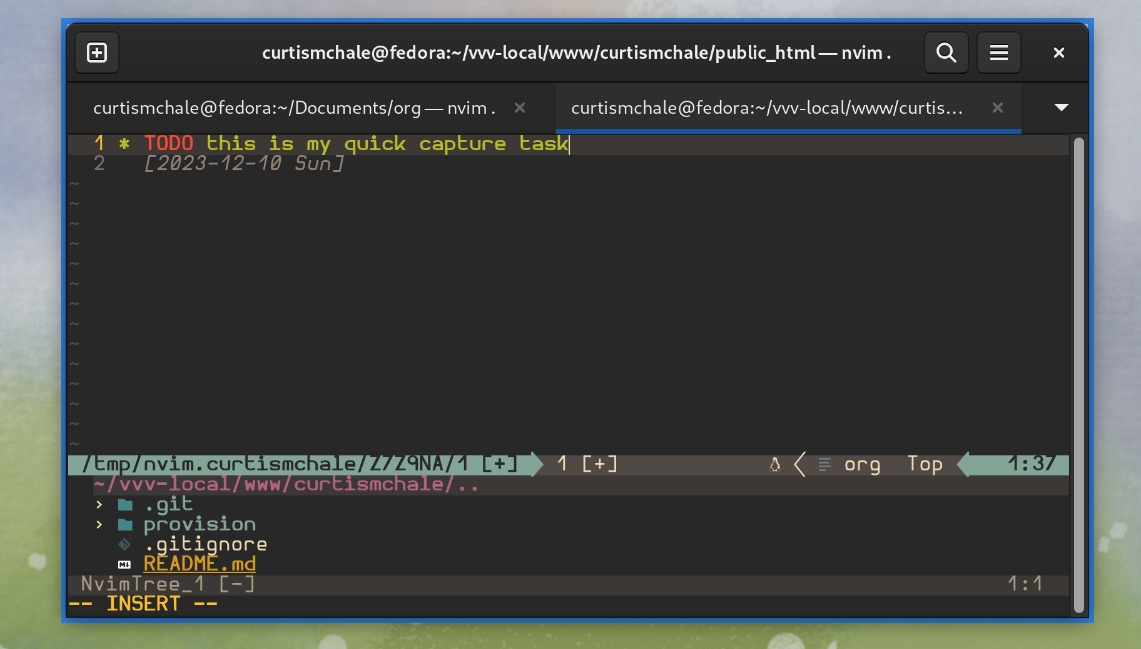
You’ll note the first screenshot above offers you the option to select a template, while I didn’t dig into them, you can set up custom quick capture templates that will place your note/task in different places in your org files.
Filing a Task
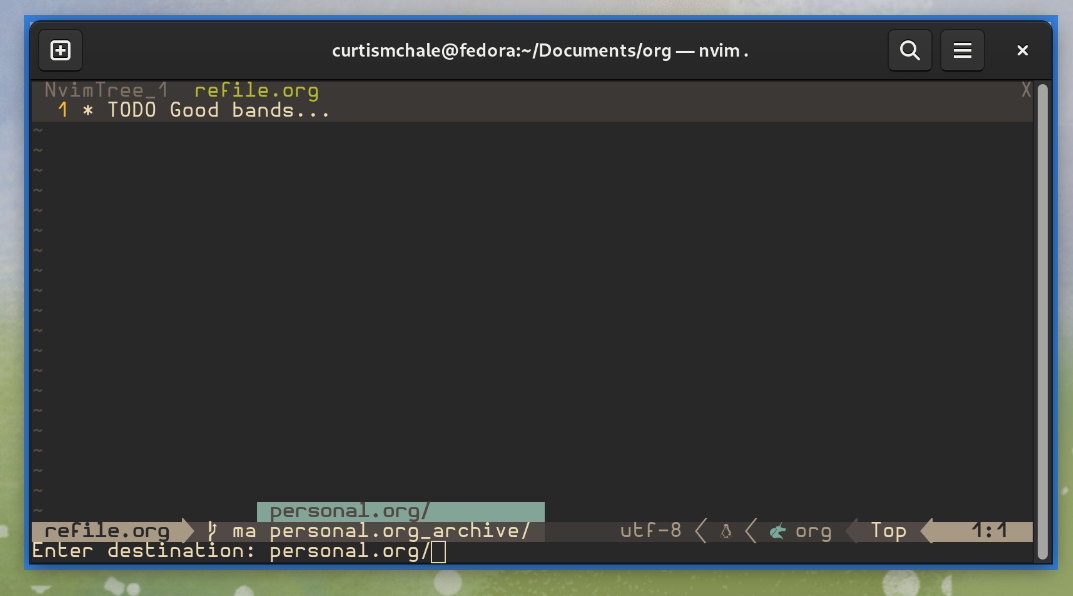
Once you have stuff in your refile.org Inbox, you’ll want to organize it into the files that should hold the individual items. To do this press <Leader>or and you’ll be presented with a dialogue you can use to type and autocomplete the various .org files you have.
Deadline vs Scheduled
Above I only highlighted the <DEADLINE> syntax, but you can also mark a task as <SCHEDULED>. When you mark a task as <SCHEDULED> you’re telling orgmode that you expect to start working on the task on that date.
This is similar to Defer Dates in OmniFocus or When vs Deadline in Things 3.
Working with nvim-orgmode Tags
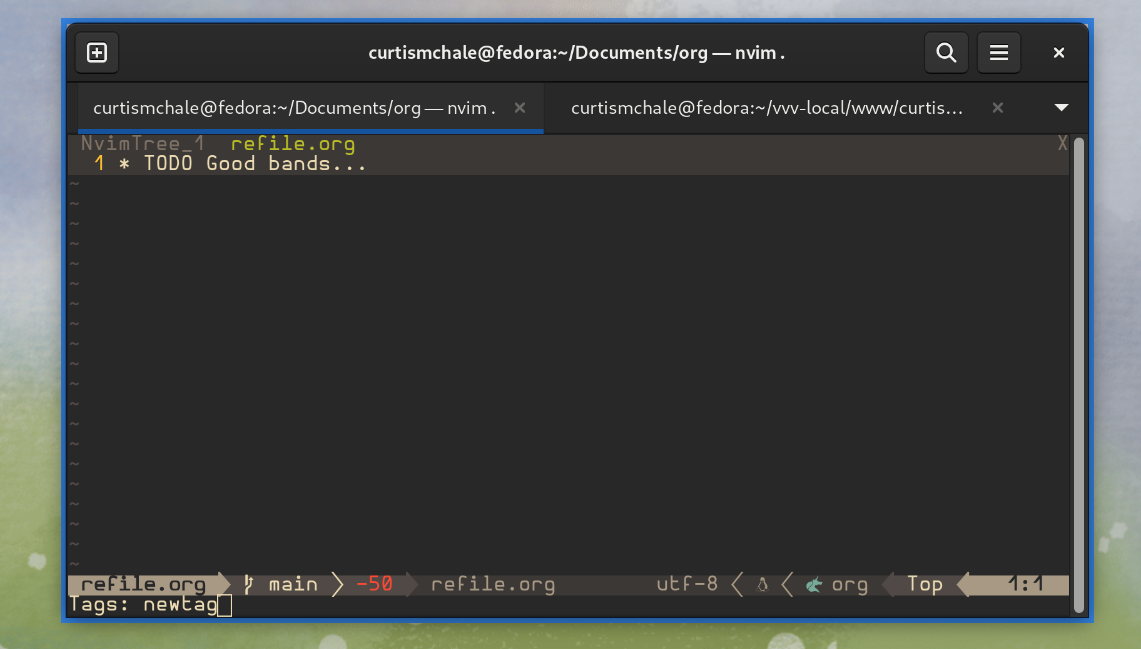
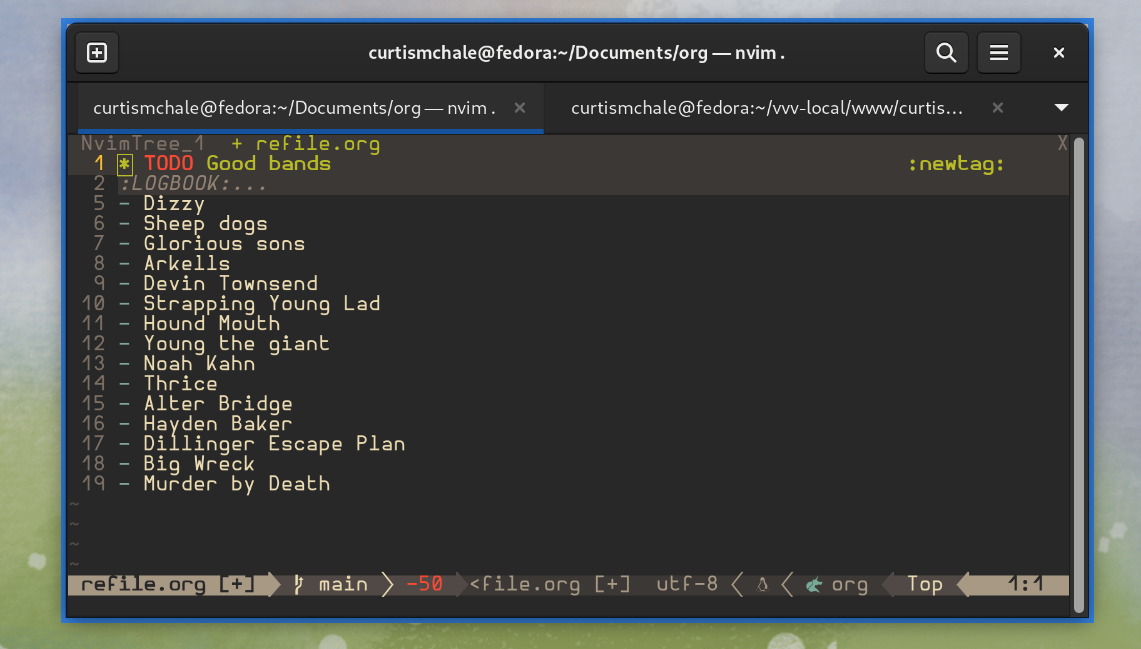
As with many task management tools orgmode has the ability to tag tasks, which means you can extract every task with a tag across all your files. I use this to mark items that need to be talked about in my monthly developer deep dive meeting by using :devmeeting:. To add a tag to a task or heading type <LEADER>ot which will bring up an interface to add tags to the heading that is under the cursor.
Marking a nvim OrgMode Task Done
When you’ve accomplished a task and want to check it off you can press cit to cycle the state of the task “forward”. ciT is used to cycle the state of an item backwards. There are 3 states for headings.
- Plain heading with no notation
* Heading TODOmarking the heading as a task* TODO HeadingDONEmarking the task as done* DONE Heading
So if you are in state 1 and press cit you cycle the heading to TODO. If you then pressed ciT you cycled the heading back to state 1 with no indication that the heading is a task.
Important nvim OrgMode Keyboard Commands
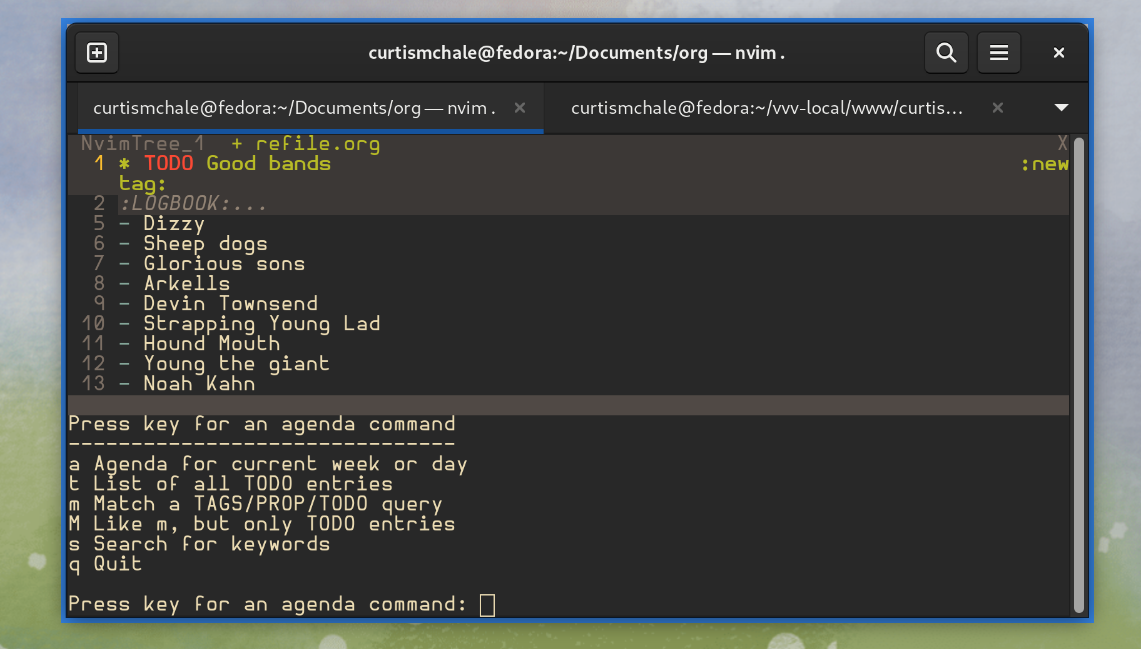
Since this is a vim based tool you can do everything from the keyboard, but there are some keyboard commands that I used regularly, that haven’t been mentioned already. The biggest keyboard command I used regularly was <Leader>oa which opens the Agenda view. This view can give you an overview of your week, or a current day, or can be used to filter down to only tasks with a specific tag. After pressing the command to access the Agenda view you’ll be presented with a few options for what you want to see.
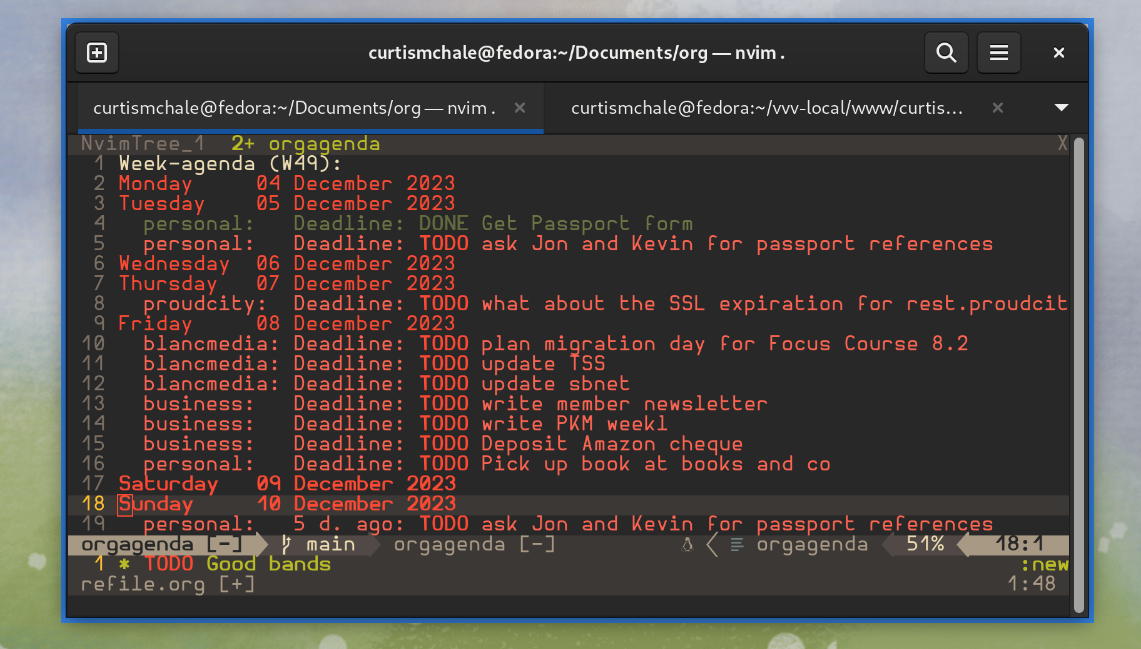
While I often started with the week view to get a good idea of what was going on with my week, I then regularly moved to the day view by pressing vd in the Agenda view. This let me focus only on the tasks that were set up for today.
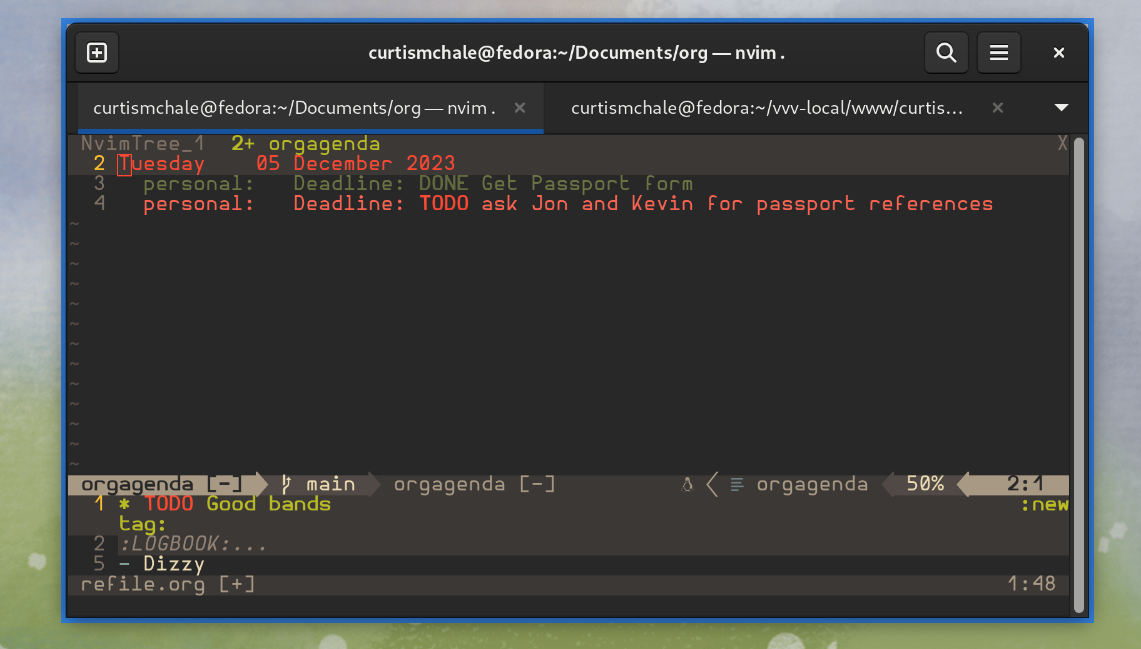
One issue with the day view is that it doesn’t open up to today it opens up to the first day of the week. As I write this on Sunday Dec 10, that means it opens up to Monday Dec 4th and then I need to press the f key a number of times to move forward in the calendar and see today. Pressing b will do the opposite and move you backward in time.
The other keyboard command I used regularly was to insert the DEADLINE text on the currently selected heading by pressing <Leader>oid. This brings up a dialogue that lets you select the date you want to have for your Deadline.
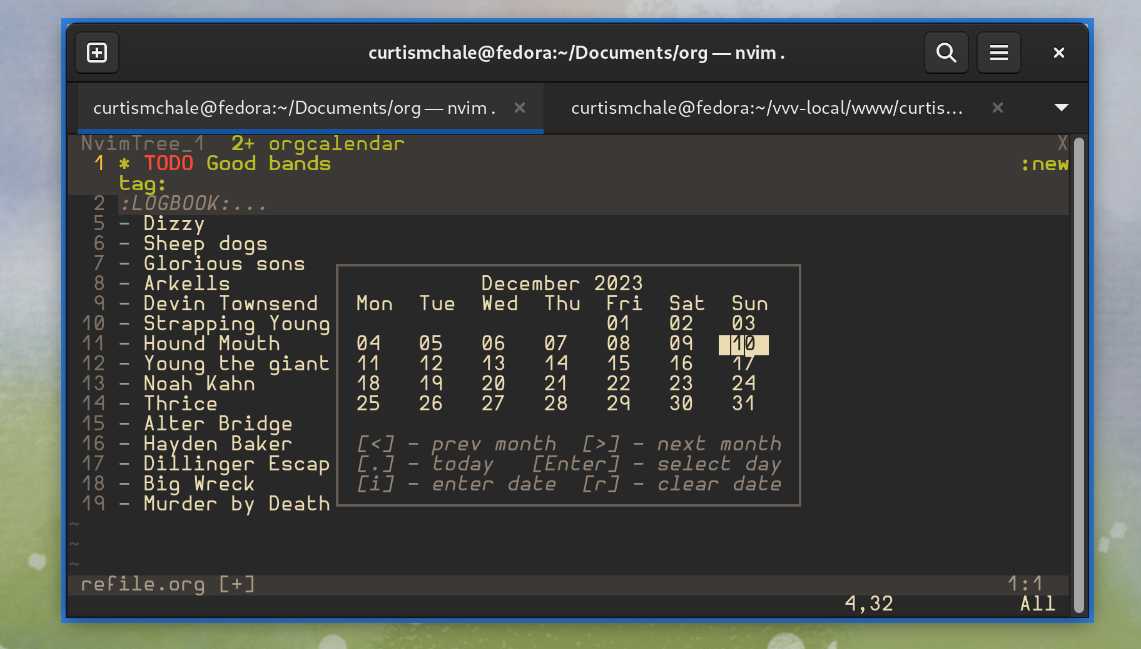
Not only does <Leader>oid let you insert a date if there is no date, it also brings up the same dialogue if you want to change the date associated with the currently selected heading. Yes this even works for items that you have your cursor over when you’re in the agenda view, so you can sort your whole week from the nvim OrgMode Agenda View easily with <Leader>oid.
The final keyboard command you need to know is g?, which brings up all the available keyboard commands. There are lots I haven’t talked about because I either didn’t use the feature or didn’t use the keyboard command enough to highlight it today.
nvim OrgMode Features I didn’t Use
There are two features of nvim OrgMode that I thought were interesting but either didn’t get to them in my time with the tool, or found the whole thing confusing so just opted out. On the confusing front was the way that you are supposed to set up Recurring Tasks in OrgMode.
In theory you take a DEADLINE: <2023-12-10> and then you need to add the recurring interval to the end so it would look like this if you wanted to repeat something every week.
* TODO my recurring task
	DEADLINE: <2023-12-10 +1w>
When I look at the syntax it looks easy enough but then we get into “shifting base date” and how prior tasks are invisible and how you’re supposed to keep track of which ones were previously acted on, or which recurring task you just forgot about…and I was out. I ended up just changing the date of a task to the next occurrence when I needed to tackle it again next week.
As I said a few weeks ago, I want to time track much more of my life going into 2024, and one thing that jumped out to my was that nvim OrgMode has time tracking as a feature. While I found it easy to start and stop a timer, the timers are also totally hidden.
I could start a timer, then move onto something else and not even remember that I had it running. Then to fix it I’d have to edit the timer and do time-based math, then tweak the new timer that should be running. While I’m sure that this is usable for a number of people, I stopped even trying after a few days and stuck with Toggl.
Syncing nvim OrgMode Files
Syncing is not something that nvim OrgMode provides out of the box like other task managers do. There is no central service to sign up for and get sync, you have to roll your won sync system. For this trial of nvim OrgMode I grabbed a copy of Syncthing and installed it on my laptop. Then I grabbed Mobius for my iPad and iPhone.
This let me set a folder to sync in Syncthing and then have it show up on my mobile devices via Mobius. Over the last few weeks using the tool I found Syncthing and Mobius to be pretty awesome. Whether I’ve been on my local network, or a few towns away, Syncthing has found my laptop and synced the files between devices.
One thing that Syncthing doesn’t do though is handle changes that may have happened on both ends of a file. I had to manually resolve conflicts once a week, unlike a tool like Things 3 or TickTick, that is always synced and doesn’t have conflict issues.
Nvim OrgMode on iOS
The story for using OrgMode on iOS is only okay. Over the course of trying to adopt this system for task management I tried three different applications. None of them stood out as an amazing choice, though none of them were terrible. Both Plain and Orgro let you open .org files in any folder, which means they worked with Syncthing fine, but neither of the applications will open a folder of .org files and make switching between them something that can be done easily.
The best option I found was Beorg, which is a reasonable $13.49/year (CDN) subscription. The biggest draw back to Beorg is that it doesn’t deal with org files that are in sub-folders so you have to have a flat set of files for it to look at. Once you’ve got that, Beorg has an Agenda view, and a number of other nice features. Unfortunately it doesn’t have great keyboard support though so working with org files on my iPad where I can have a full keyboard is little better than using Beorg on my iPhone where I only have the software keyboard.
Should You Try nvim OrgMode?
While I loved the keyboard control and the notes integration of nvim OrgMode while I was using a traditional computer, I do enough work on my iPad and the apps are so bare bones that I can’t make this my full-time task management solution. It may still have a place in my life when I’m working inside a coding project and need to track notes for that project, but that’s about it.
If you don’t really use your mobile devices to deal with your tasks and you live in vim/nvim already, then nvim OrgMode could be a great tool for you. The rabbit hole of what you can do with it goes much deeper than I travelled in my time with the tool. It could certainly use an improvement in its documentation, but that’s a fairly common refrain for most open source tools. Developer focus on writing new features and don’t prioritise documentation work as the most effective use of their time.

Getting Started with Obsidian
If you want to learn your way around Obsidian so that you can build a great note system then this course is for you. I’ll cover basic folder structure when to use tags or links, and the plugins I think everyone needs to make their Obsidian experience excellent. Plus much more. If you want all my courses, become a member.
$99 USD (30-day guarantee)
