
For a while now I’ve been writing about my Analogue Productivity system. I started with the 10 Constraints you need and the 1 Action you Should Be Taking.
Today we’re going to dig into the basics of the Bullet Journal system so that you’re familiar with it. Next week we’ll look at exactly how I modify that system for my web development business.
The first thing to do is stick with the basics. Just like any productivity system, there is a lot of Bullet Journal porn out there. Just do a search an Pinterest or Google Images for Bullet Journal and you’ll see lots of them that are beautiful, and that I’m never going to create. Seriously, I don’t even know how some of them are even useful outside of being art practice.
As you’ll see when we tour my system, I’m no artist and don’t do any drawing in my journal unless the task I’m working on requires some sketch of something. Most of the time that means I’m deciding how to relate ideas so it’s more a brainstorming map instead of something to look amazing.
All you need to Bullet Journal is a book. It’s nice to have either a grid layout on the pages or a dot grid. It’s nice to have your pages numbered. It can be nice to have the official Bullet Journal, but none of that is required.
What are The Bullet Journal Modules
Your Bullet Journal starts off with an Index. Just like any book, the index is how you know where everything is in your book. I generally stick to large groupings. I put each month in the index, not each week.
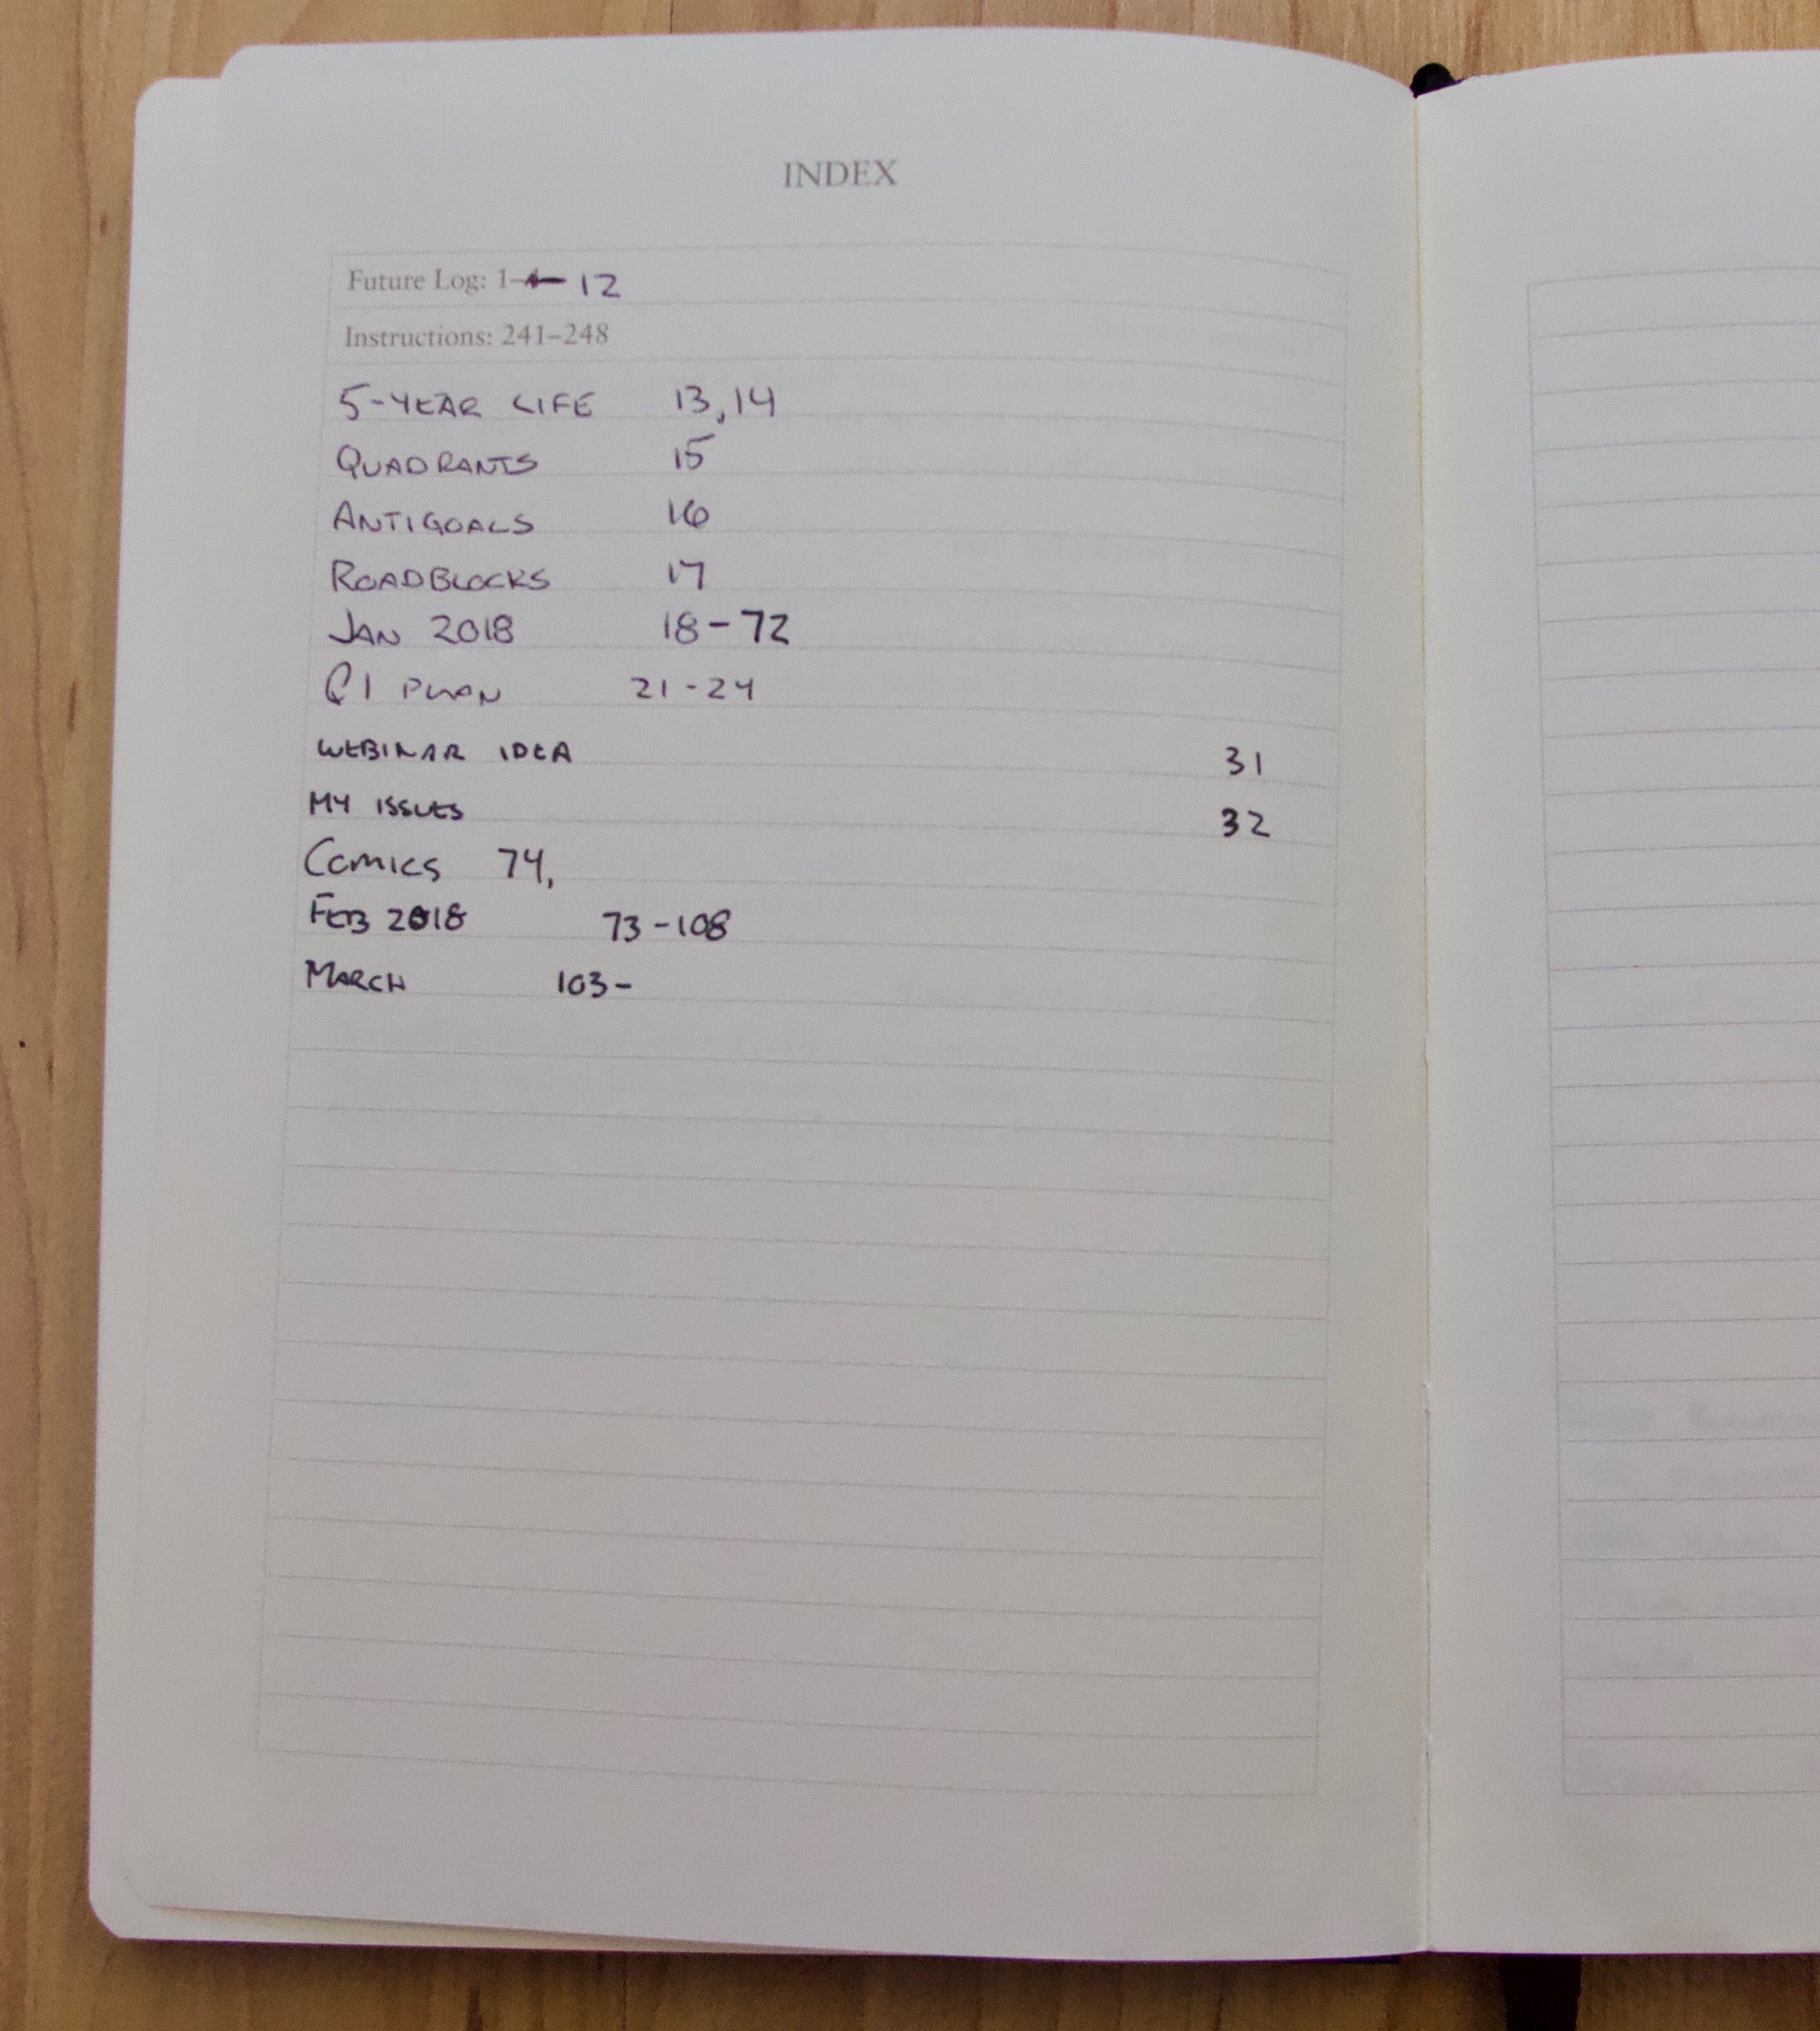
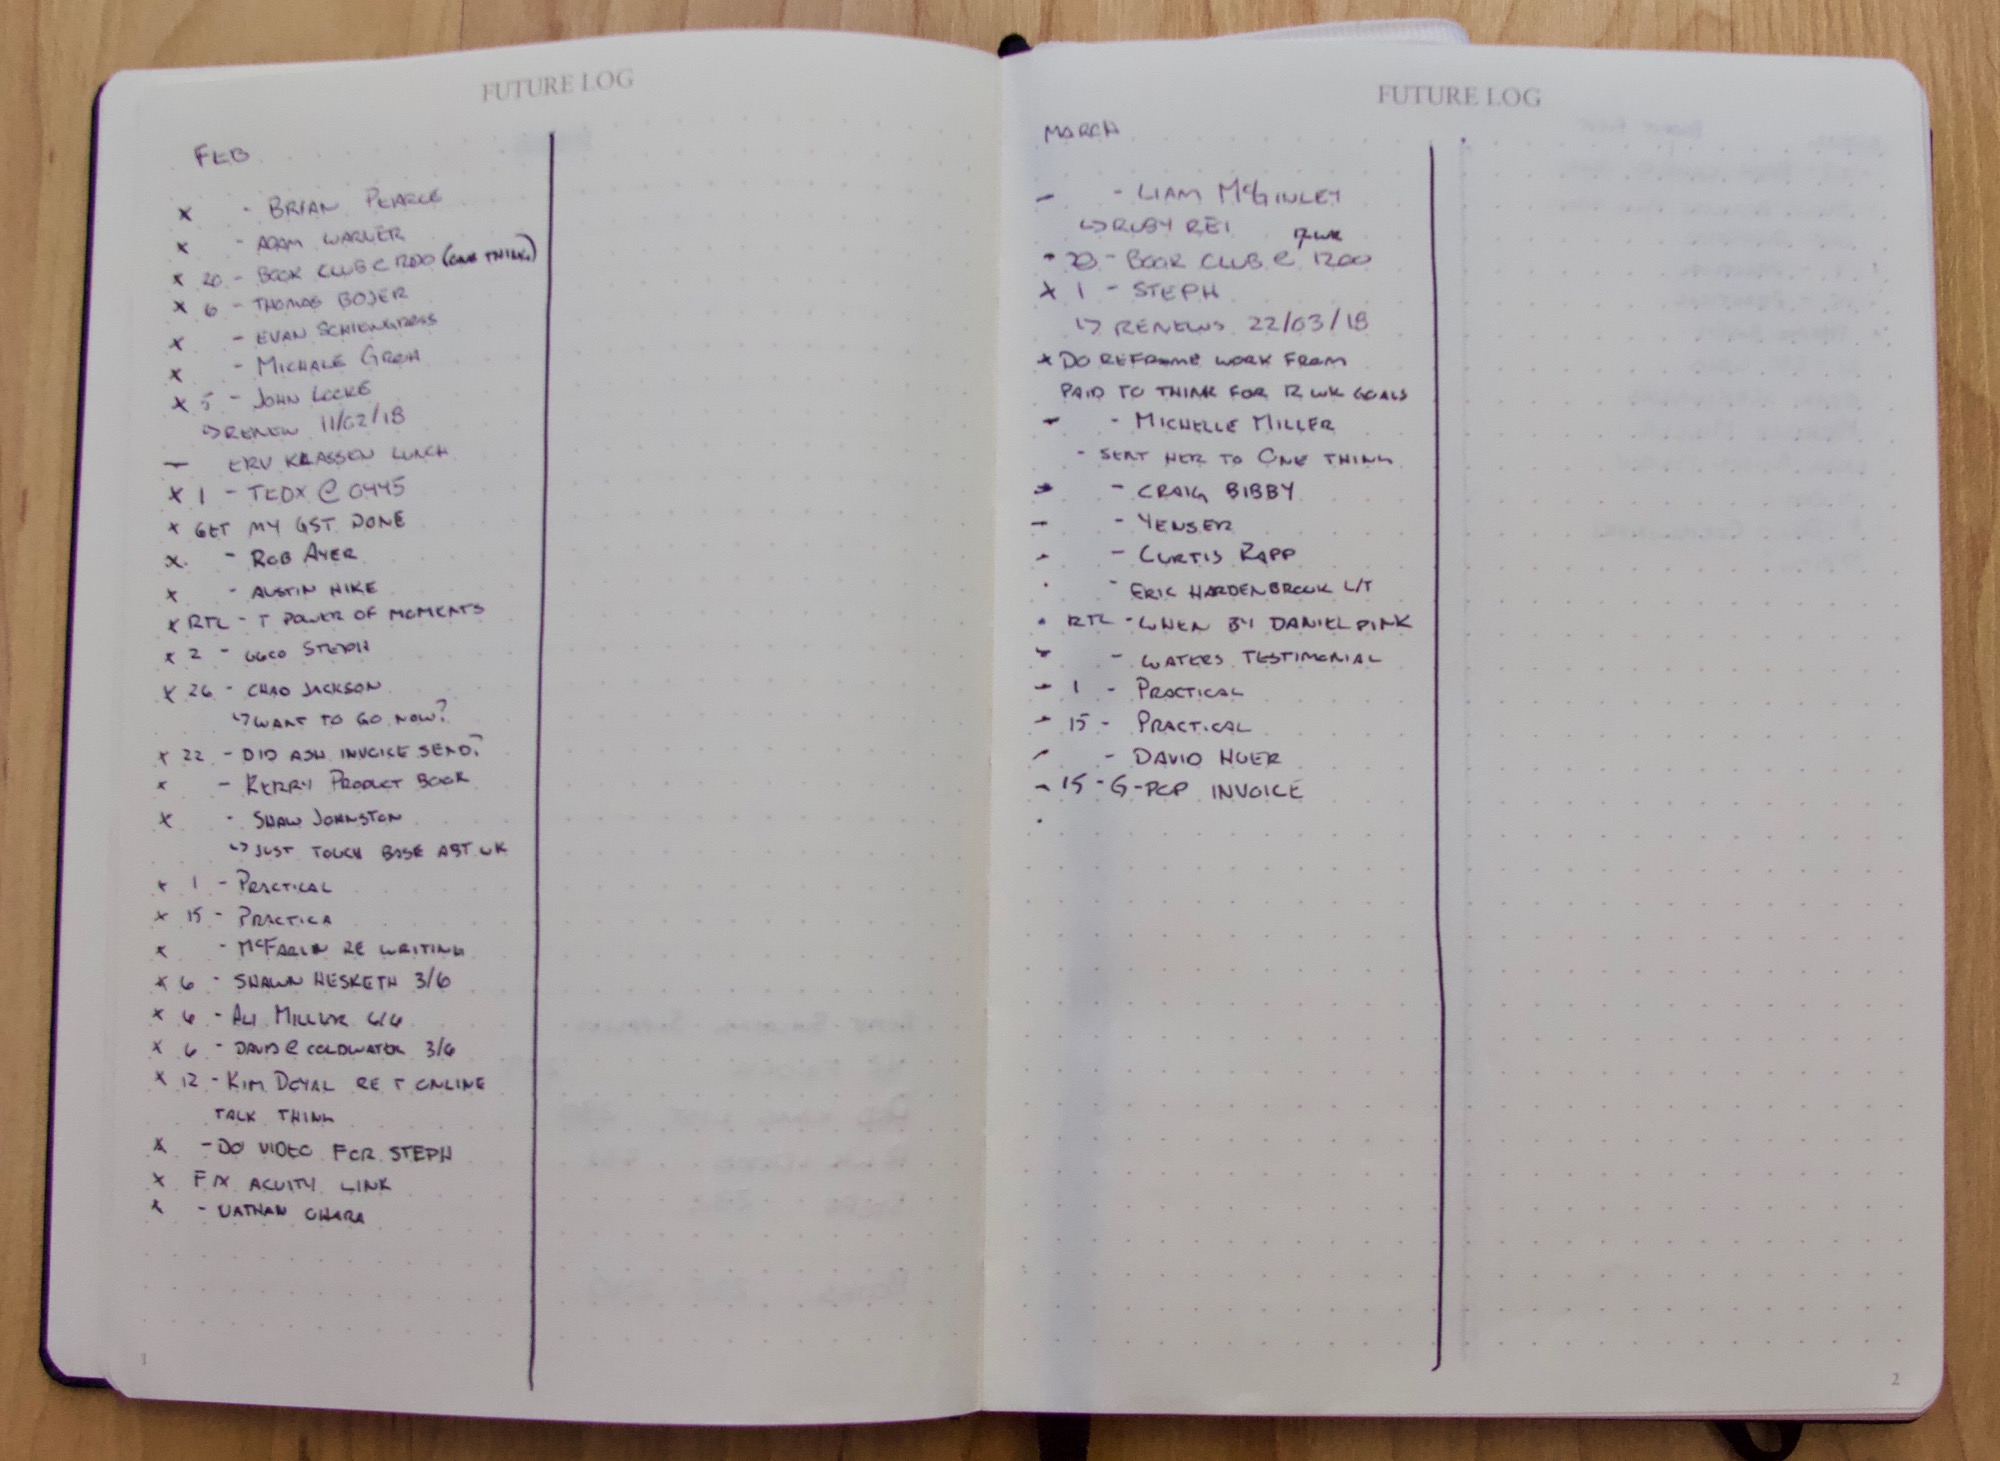
After your Index is the Future Log. This is a listing of the months in the future so you can put tasks down that need to be done at some point that’s not now. I leave one page per month and cover the next 6 months. The final page of my future log is for “Future” which means it’s a collection of any tasks that need to be done after the 6 months I have currently recorded.
You can cover more than 6 months or less. I go with 6-months because that’s about how long a journal lasts for me. Around the 4 month mark it’s mostly full and I migrate to a new book.
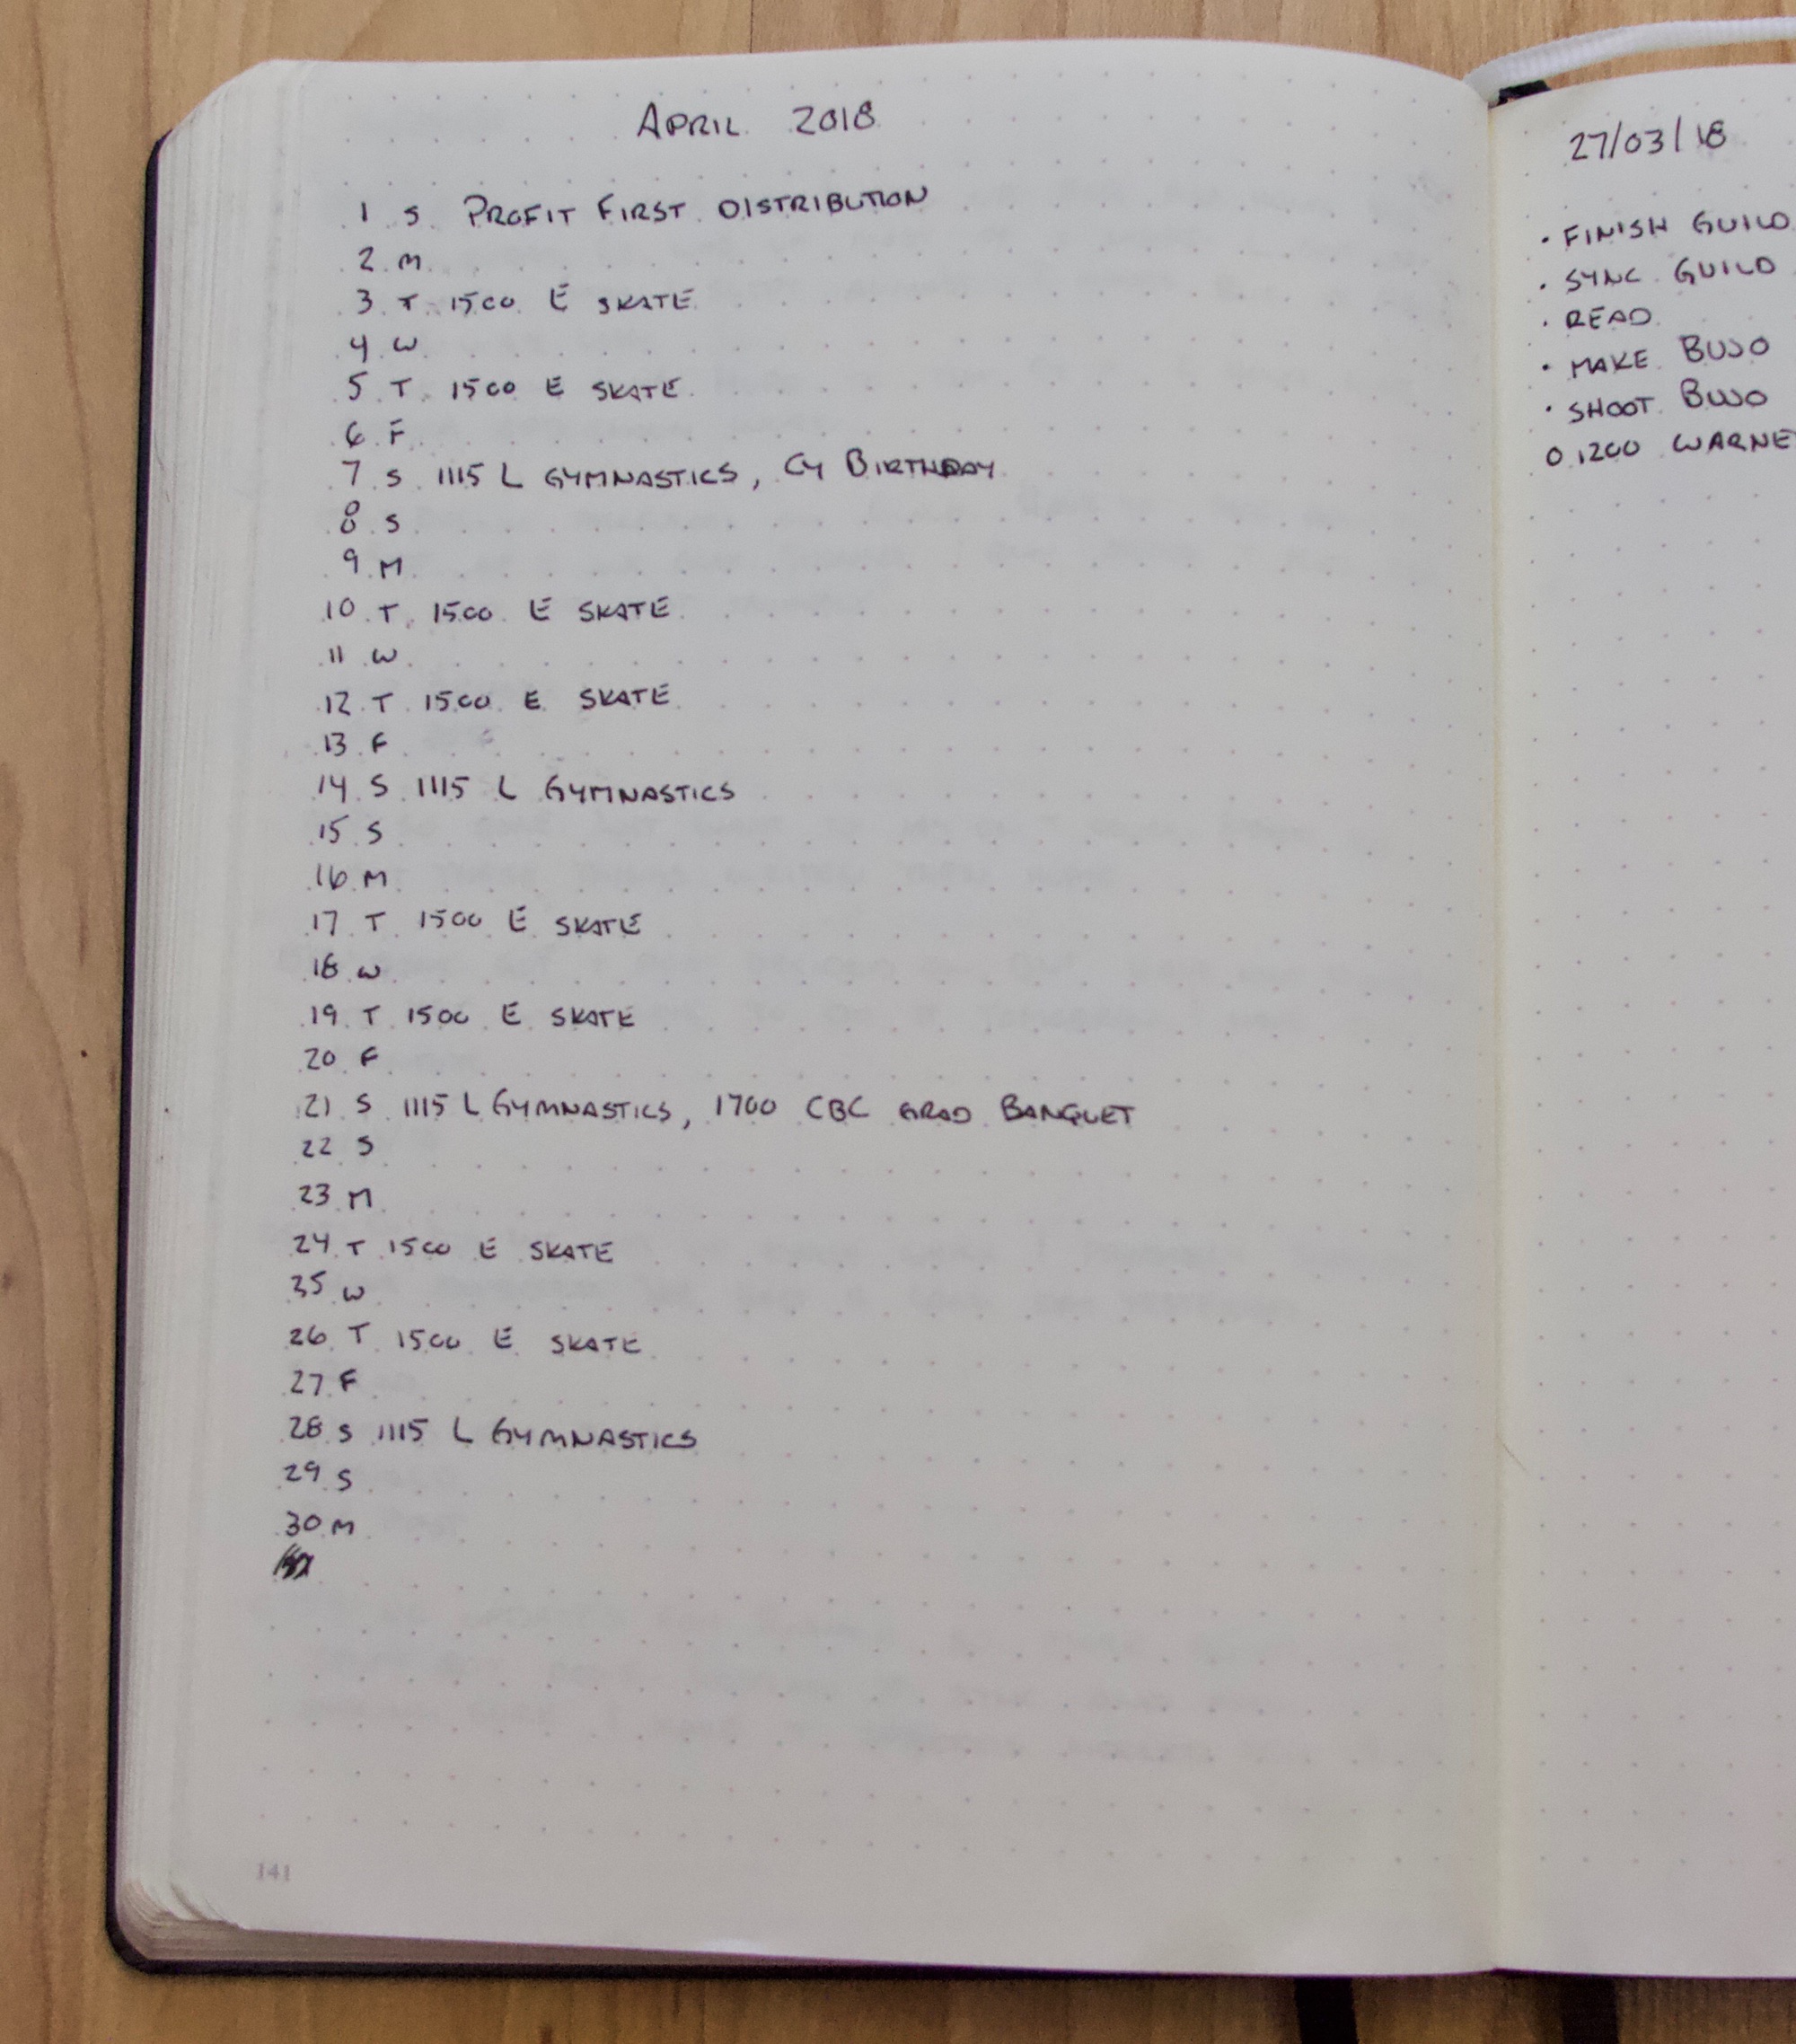
Your Monthly Log, is a log of everything happening in a month. Usually this goes after you’ve already done some tasks and such. So it might be on page 24 or 100. In the original system it’s simply a list of all the dates of a month and then the days of the week that correspond with them.
That leaves you with one line per date which isn’t quite enough for me so I make some modifications to it, which we’ll talk about in my next post when you see how I’ve modified the Bullet Journal to suit a web development business.
The final component of the official Bullet Journal system is the Daily Log. This involves a date and then the tasks/items that go with a specific day. There are a few signifiers, but it all starts with a bullet. We’ll dig into exactly what signifiers are later in this post.

Once you start looking around at Bullet Journals you’ll notice that many people do a weekly log and I don’t mention it. I do a weekly log every Friday as part of my planning ahead. The weekly log is not part of the original Bullet Journal System so we’ll discuss it later as I talk about my specific modules and how I use them.
What is Rapid Logging In a Bullet Journal?
The next key component of Bullet Journaling is called Rapid Logging. This is really just writing things down fast with a fancy name but holds a great key that’s not surfaced well on the Bullet Journal site.
The key thought is that you’re not writing a journal entry. This is not a blog post. This is a quick place to jot down a task, make it quick and simple.
Rapid Logging consists of four parts:
- Topics
- Page Numbers
- Bullets
- Short Sentences
You start with a Topic which is a heading telling you what a page is about. The simplest Topic is the current date. I like to use dd/mm/yy format because that’s what we use in Canada. The format you choose, only matters to you so use what works for you.
Second up is Page Numbers. You’re going to be creating an index with the first few pages of your Bullet Journal, so you need page numbers to help you find the items out of your index. This is where a numbered notebook like the official Bullet Journal can save you a bunch of time, because you don’t have to number it by hand.
[optin-cat id=13012]
You can shortcut the numbering process by numbering every other page or every 10th page. No one says you have to hand number every page. If that seems like a barrier, don’t let it be one.
You could decide to colour a corner of the pages by month so that from the side you can quickly find the month you want. The only requirement is that with your index you can quickly identify a page that you want to get to in your Personal Productivity System.
Third is the Bullets which are the core signifier of the Bullet Journal System. We’ll talk more about Signifiers later in this post. Every entry gets a bullet to start it at the beginning of the line.
Finally are the Short Sentences used to denote a task or event, or note. The point here is to keep them short and actionable. You don’t write “Ted” you write “call Ted about coffee”. If you only write down the name of the contact, then you have to spend mental energy figuring out exactly what action is paired with the name. Cut that out by making sure that each item is actionable.

What Are Bullet Journal Signifiers?
Signifiers are the ways to mark an item in your Bullet Journal. It all starts with a bullet and there are six core signifiers in the standard Bullet Journal System.
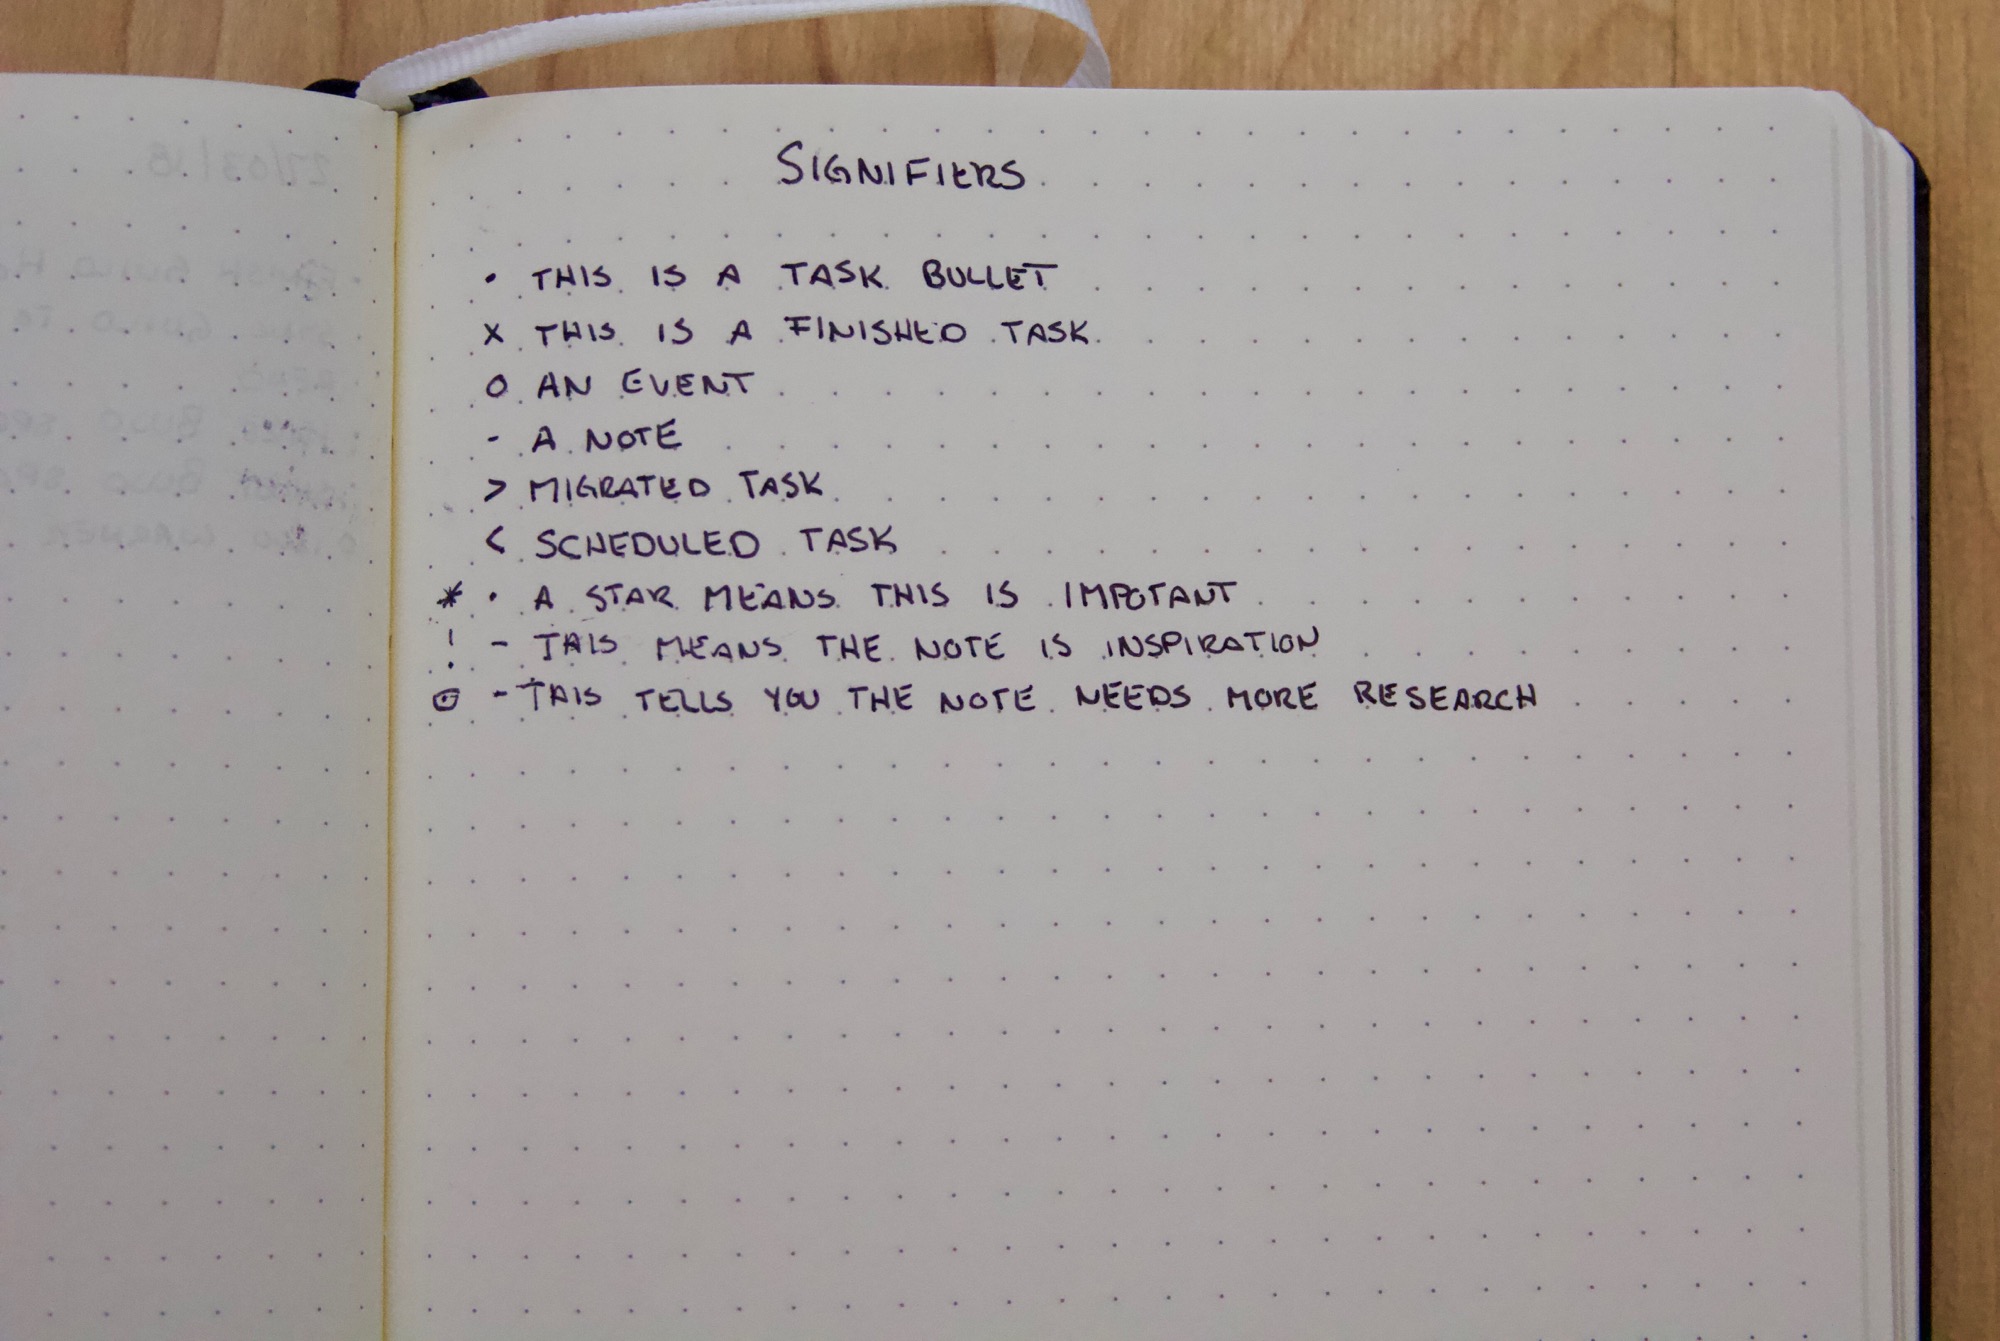
As I’ve said, and you could probably guess, the whole system is started with a bullet. This can go before every item in your list.
After the bullet, when you complete a task you turn the bullet into an X.
Use the \> to show that a task has been migrated to a Collection, yes we’ll talk about what exactly a Collection is in a bit.
Use the \< to show that a task has been scheduled in some form.
You can turn a task into a – to make it a note. A note isn’t actionable, but maybe you thought it was going to be. An example of a note would be the colour you liked at the paint store that you want in your kitchen.
Finally some variation with the O which represents an event. Events are date related activities, and I add the time beside them to show appointments on the day in question.
After that, there are a few other Signifiers in the standard system. You use a * to show that a task is a priority for the day.
Use ! to show that the item is an inspiration item. This is usually paired with a note and might be a favourite quote you found in the day.
Finally, they have an eye signifier that shows you that the item is something you need to look in to. Maybe you need new jeans and the store doesn’t sell a style that fits you so you have to research where you can find a greater selection of styles for your body type.
As you get more comfortable with the system you can feel free to come up with any signifier that suit your needs. To start, don’t do this. Stick with the system and only embellish if you need to. Remember a key concept in your system should be solving a problem. If your new signifier doesn’t solve a problem, don’t use it and don’t worry about it.
Don’t start using a flower just because it’s pretty. If the pretty gets you to do something more, then fine, but keep it simple.
What Are Bullet Journal Collections?
In Bullet Journal parlance, Collections, are any grouping of pages. So a list of the ideas for site content is a collection. The month of January with your Monthly Log and any Daily Logs are also collections.
Any set of notes or tasks that are related by a common theme are a Collection.
You don’t need to get fancy with how you deal with Collections. Flip to the next available page and then start the Collection you want to start. Add the topic at the top of the page and then, if you need to, make sure the page is numbered.
[optin-cat id=13012]
You’re not supposed to worry about “saving” pages for an expansion of the Collection. If you need another page, flip back to the Index and add the secondary pages that are needed to find the whole Collection. That means your Collection can be split over many pages.
Yes I find this maddening, but I have a “hack” to deal with Collections and the Index which we’ll talk about when we look at how I’ve modified the Bullet Journal System for my WordPress Membership Business.
How Do You Migrate to a New Bullet Journal?
One of the key benefits of a Bullet Journal is that Migration takes time. This is a constraint on the system, because if it feels way to hard to move a task forward, then clearly it’s not valuable enough to keep track of. Don’t migrate it, cut the task from your list.
Say you’ve got a list of tasks for the day with a few notes thrown in. Maybe just like this:

If you don’t get them all done in the day, you need to start your Migration. That’s where your \< and \> come into play. Mark each task as either Scheduled or Migrated and then forget about the day. Your tasks are captured in the system.
Going with Analogue Productivity in a Digital First World
And…that’s it. With the information above you’re ready to start the standard Bullet Journal system.
If you’re anything like me though, you’re ready to dig deeper into what it’s going to take to use a Bullet Journal day to day. Next week I’ll walk you through exactly how I use a Bullet Journal to run my Web Development business, all my writing and the rest of my life.