While I develop locally, I also need to show off new work to clients before it gets approved and pushed to a live site and that means I need a staging site that is accessible on the web to my clients. That site is also accessible to everyone else that is using the web, which is not what we want.
Today I’m going to cover a few ways to lock down your WordPress staging site so that search engines don’t index it, and more importantly, site users don’t accidentally end up on it.
Restricted Site Access
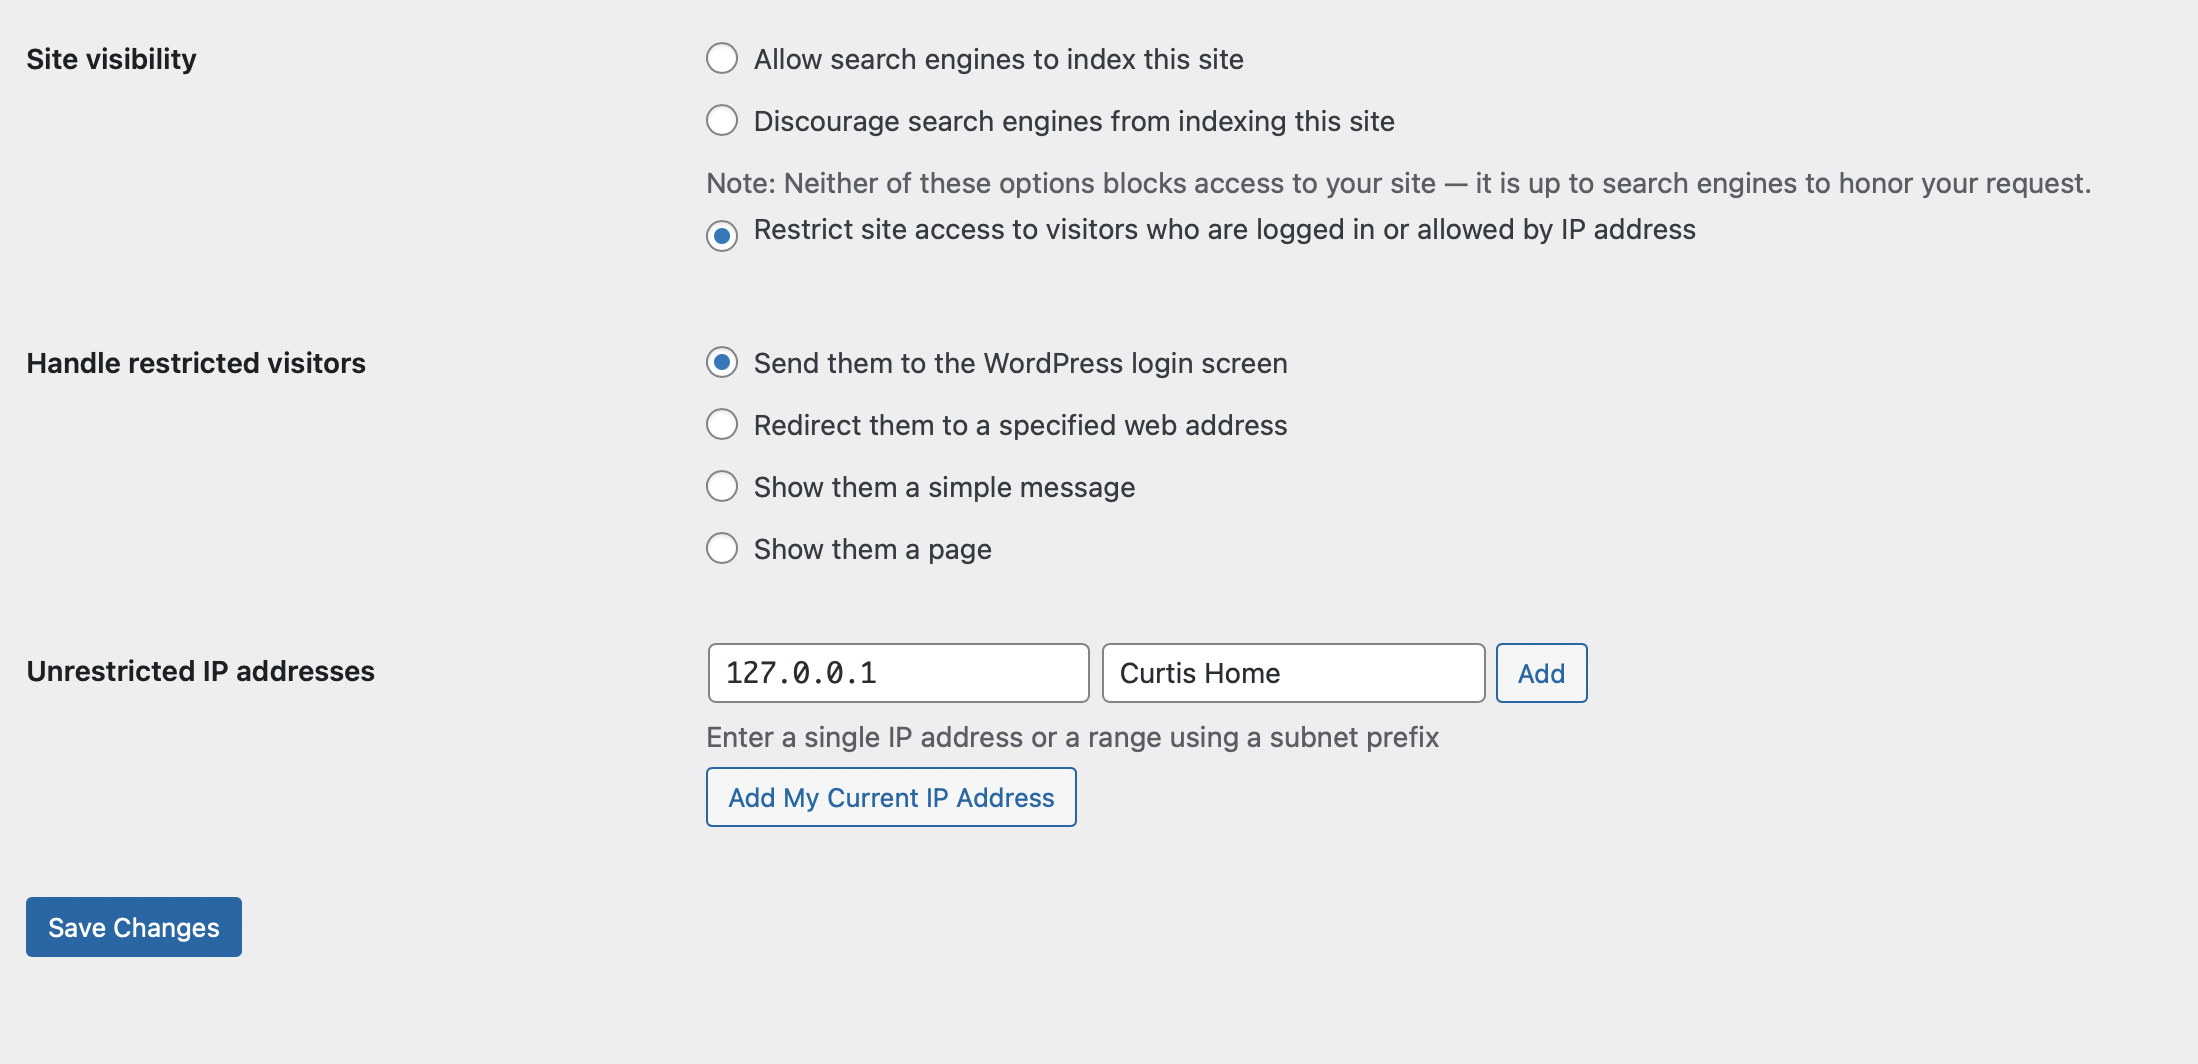
The first tool I used to do this was Restricted Site Access. This plugin allows you to lock a site down from the WordPress admin area.
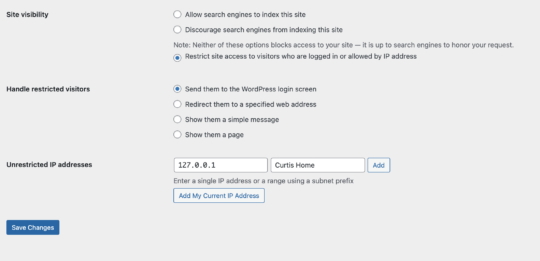
Go to Settings->Reading and change Site Visibility to restrict who is allowed on the site by the IP Address they visit from. Then choose if you want to send users to the WordPress login screen, or to a custom URL. Sometimes it’s good enough to just ask people to log in, but you can use the custom URL option to redirect users that don’t have their IP address allowed back to the live site.
That does mean if your IP address changes you’ll need to manually deactivate the plugin by changing the name of the folder using FTP. Set your IP address in the WordPress admin and then get the plugin activated again.
WP Engine Web Rules
While I still use Restricted Site Access, I recently changed one client over to use a new feature of WP Engine, Web Rules. This lets less technical users edit the ranges of IP addresses that are allowed to access the site just like you could with .htaccess or ngnix-config files, but means you don’t have to be able to access the server. It also means if you create an error, you don’t get totally kicked off the server, you can simply delete your change and the site will go back to how it was working before.
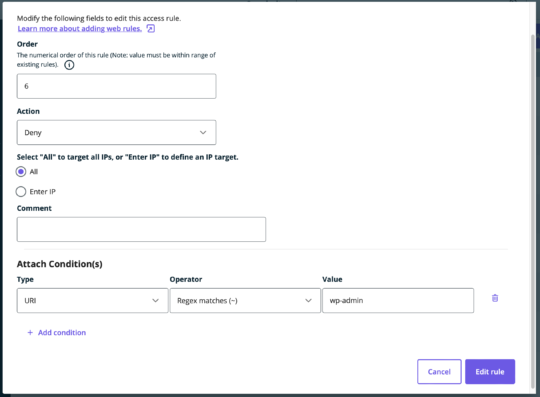
To get started go to the WP Engine environment that you want to lock down and choose Web Rules from the left-hand column. The first rule you’ll need to add is a rule to deny all traffic from viewing the site.
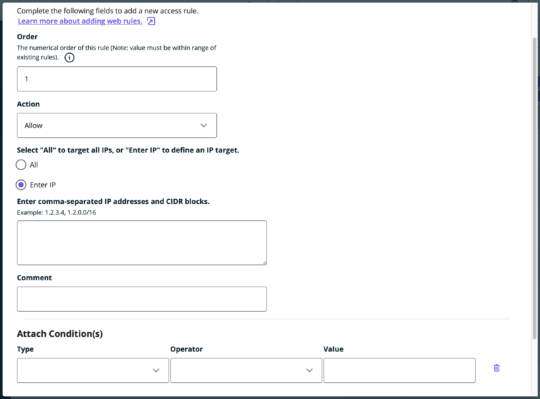
Once that is set, your site should stop being accessible to anyone. Of course, you want to be able to access it, so next, you should add a rule to allow your IP Address. To find your IP Address I use this site and you’re going to want the IPv4 address because Web Rules don’t currently work with IPv6 addresses.
Now create another new web rule with the Action set as allow and the IP address set to the one you just found.
That’s it, your site is now locked for everyone except for those with specifically allowed IP addresses.
Which Tool to Use?
One of the things I like about using Restricted Site Access is that I can programmatically set the IP addresses that are allowed to view the site with my Github Actions deployment scripts. I use these scripts to do other things like setting the staging payment gateway so keeping everything in one spot is nice.
But, if a client uses the WP Engine site cloning features and doesn’t run deployment they’re going to break the site lock.
What methods do you use to block site access to users for staging sites?