
While Obsidian does have an excellent sync service that I use for my personal Obsidina vault, it's not always the right option for people. In fact, for my regular job we don't use Obsidian Sync to store our Obsidian vault that contains internal documentation. Instead, we use Obsidian Git to store the changes.
What is Git?
If you're not familiar with Git or with any type of version control system syncing with Git may not be for you. Git is a developer-focused tool that can track all changes in files. It allows you to push your changes to a central repository and will detect if a file has been changed by two people. Depending on how a file has been changed by two people, Git may be able to merge the two changes seamlessly.
It's quite possible you'll have to look at the command line sometimes if you want to use Git with a team of people. In fact, to set up Obsidian sync via Github, you'll have to touch the command line today. If the thought of the command line or terminal makes you nervous, you likely don't want to use Git to sync your vault.
If you don't have Git installed on your computer here are instructions to install it for all operating systems.
For the company I work with, documentation is mostly done by developers so all of the team is very familiar with how Git works. We use it daily to get our code changes synced up across multiple repositories.
Setting Up A Private Git Repository
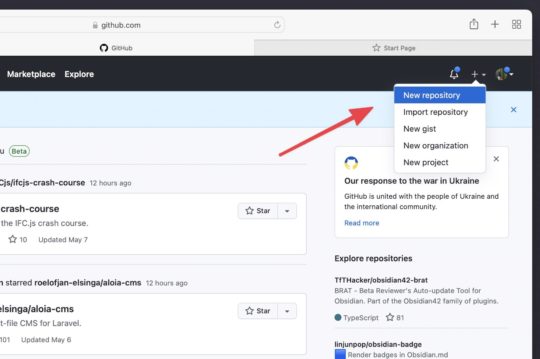
To get started you're going to need to go to Github and create an account if you don't have one. Then in the top right corner click the small + button and choose New Repository to create a new repository to house your Obsidian Vault.
 New Github repository
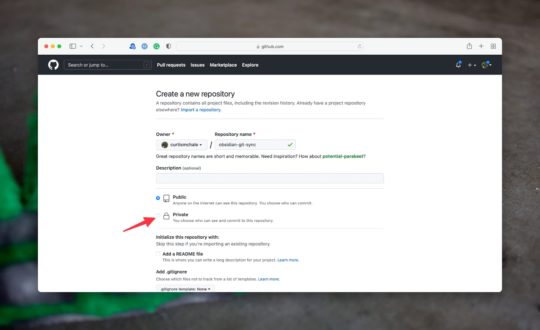
Now you should see a screen where you can name your new repository. I'll call mine Obsidian Git Sync. Here you'll also need to make sure that you mark the repository as Private as shown by the red arrow below. Once you've named the repository and made it private it's time to scroll to the bottom and click Create Repository.
 Name your private repository
Now we're getting into a few things that are a bit nerdy. The page you're greated with has a bunch of commands to use via the command line to set up your local repository. You will need Git installed on your computer to perform these commands.
To start, open your command line application, macOS ships with Terminal, and use the cd command to change to the directory where you want to save your new Obsidian vault. I'm going to put mine in my documents folder so my command is cd ~/Documents.
Next, you'll need to create a folder to hold your Obsidian Vault. I'll call mine obsidian-git-sync which means the command to use is mkdir obsidian-git-sync. Then we'll need to move into that directory with cd obsidian-git-sync.
Now we need to turn this folder into one that supports Git by using git init.
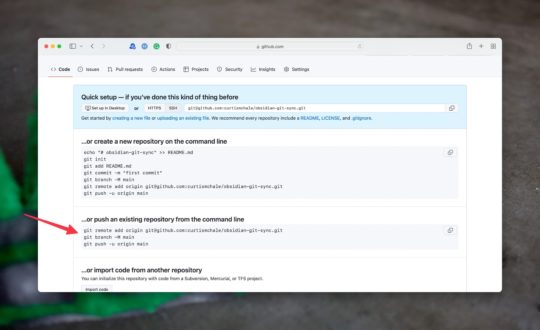
Now we need to head back to our web browser and look at the commands that Github provided us once we had created the repository. We want to use the set of commands that allow us to push an existing repository to Github.
 Linking repository commands
With that done we're almost done with the command line and we're ready to open our new repository in Obsidian and get it syncing with Github.
Syncing A Private Git Repository with Obsidian
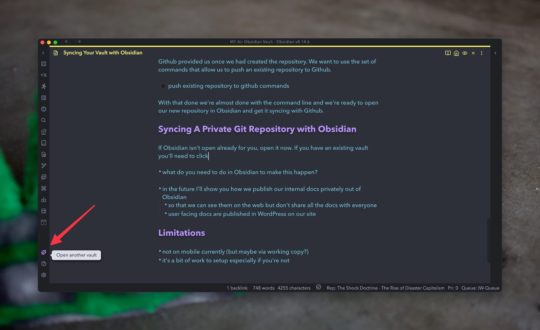
If Obsidian isn't open already for you, open it now. If you have an existing vault you'll need to click Open another vault in the lower-left side of Obsidian.
 Opening a new vault
This will bring you to the Vault creation screen, which you should see if this is the first time you're running Obsidian.
 Open vault screen
We're going to choose Open folder as vault and then navigate in the file browser to the location of the folder we created above.
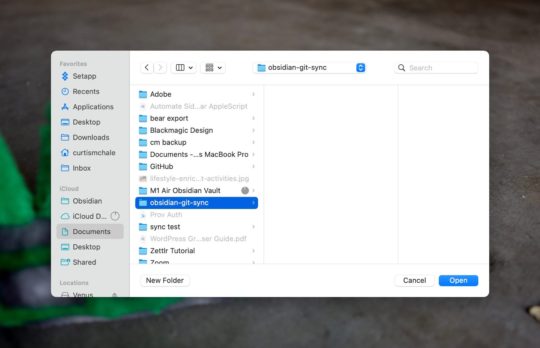 My new vault in macOS Finder
Now we have an optional step. If this repsitory is just for your notes, then don't skip this step in the terminal. If you're going to use this vault with others for documentation we want to exclude some files so that we don't sync user preferences like theme settings between users.
Head back to the command line and type touch .gitignore. This will create a file that tells Git to ignore some of the contents of the directory. Now open .gitignore in a text editor like Vim or Atom and add the following lines to it.
`.obsidian/app.json
.obsidian/appearance.json
.obsidian/hotkeys.json
.obsidian/workspace
`
This will allow users of the respository to customize their app settings, appearance, hotkeys, and workspaces without other users having the same settings. We are still allowing plugin settings to be synced between users because those are needed for functionality that users will share.
To finish this off we need to head back to our command-line application and commit the changes to git. Do this with the following commands.
`git add .gitignore
git commit -m 'initial ignore commit'
git push origin --all
`
With that done if you head over to your browser and refresh you'll see that your repository has some files in it. Now we're done with the command line and we're ready to tell Obsidian that it can sync with Git.
Open up Obsidian settings with the gear icon in the bottom left corner and go to the Community Plugins menu item. You're going to need to turn off safe mode now by toggling the button.
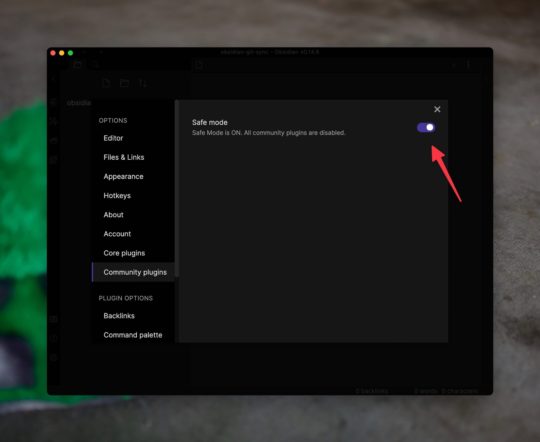 Safe Mode toggle
Now Obsidian will greet you with a big screen telling you about the possible issues from turning off safe mode. Just turn off safe mode.
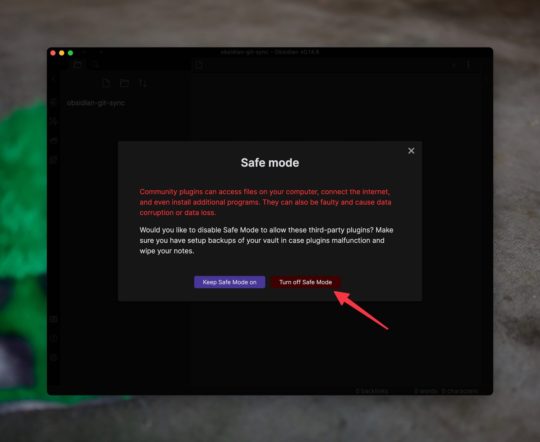 Safe Mode scare screen
Now we need to Browse the Community plugins and type Git into the search box to bring up the Obsidian Git plugin we want to use. Click Install and then click Enable.
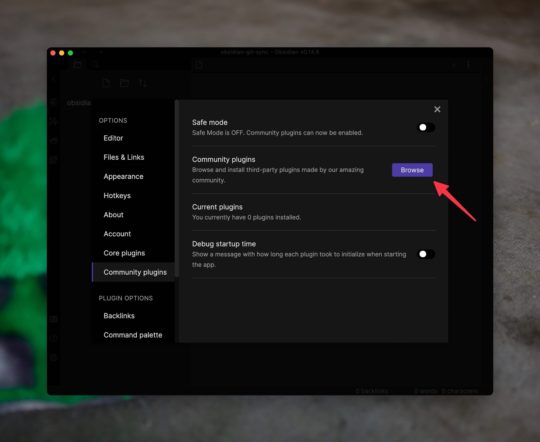 Browse to Community Plugins
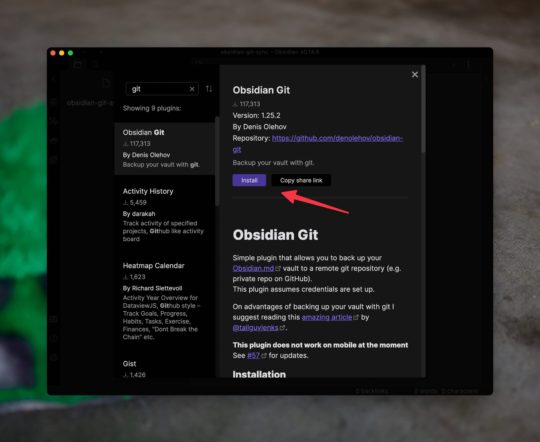 Install and Enable Obsidian Git
Let's create a new file in Obsidian and sync it. On macOS ⌘ + N will create a new file. Call it whatever you want and put some content in it.
To push our new file to our repository we're going to use Obsidian's Command Palette which is accessible on macOS via ⌘ + P. On Windows, it should be CTRL + P to open the Command Palette. With the Command Pallettet Open type git to see a list of commands that the Obsidian Git plugin gives you. We're going to use two different commands most of the time. First we'll use Commit all changres to tell Git that it should save the current state of the files. Second, we're going to use Push to push those changes to the remote repository.
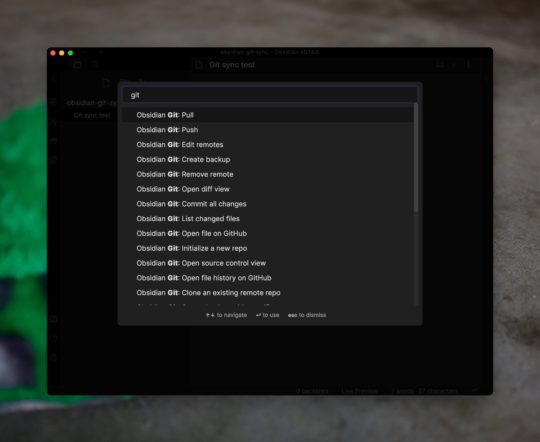 Full list of Obsidian Git Commands
You may be asked about the upstream branch here. Choose origin and then origin/main. This is telling Obsidian Git to push to the main branch of the repository we created.
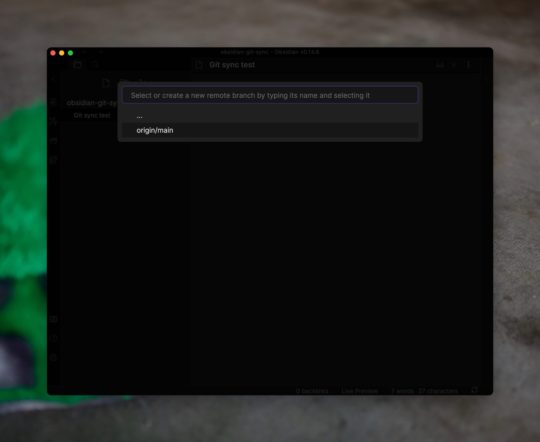 Choosing your branch
Every time you make some changes and want to save them you'll need to use Commit followed by Push to have those changes saved to your remote repository. If you don't do this, the changes are sitting on your computer only using the default settings of Obsidian Git.
Since we can all forget that step though, let's go to Obsidian Git settings and change the Vault backup interval to 5. Now your vault will be backed up to Github every 5-minutes.
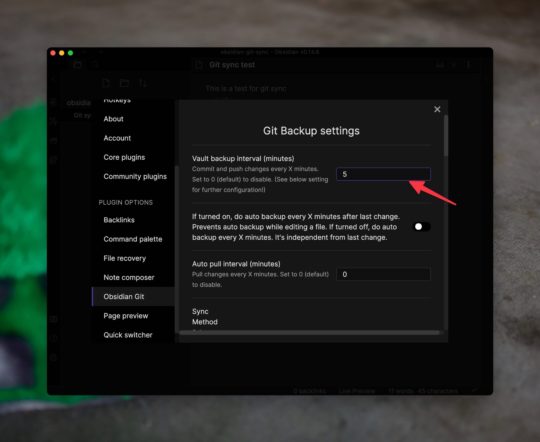 Change the backup interval for Obsidian Git
Limitations
While this is a great option for sync, there are a few issues with it. First, it's obviously a bit complex to set up so it's not for everyone.
Second, the Obsidian Git plugin doesn't work on mobile currently. There is some discussion about making it work for mobile but we don't have an ETA on it. On Apple mobile devices you can likely use Working Copy to access your files and edit them. I'll be looking at that in the future and will make a video on it if it seems to be working well.