Default List
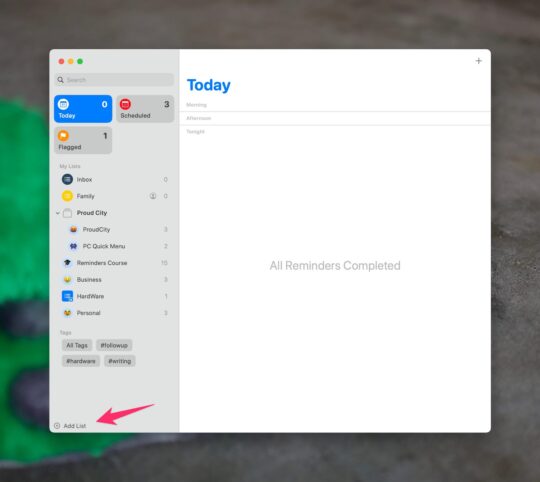
Before we get started with adding tasks to Reminders, you really should set up an Inbox list. To do this click Add List at the bottom of Reminders and make the name of the list Inbox. You’ll want to use this list as the default spot for all new Reminders that are added.

You can also choose a colour for your list and pick an icon that you want for the list. This includes choosing from the emoji’s that are available on your devices.
You’ll see here that you can create Templates and Smart Lists. We’ll cover those in later videos.
Once you’ve created your Inbox list you’ll need to set it as the default destination for all tasks that don’t get set to a specific destination in Reminders.
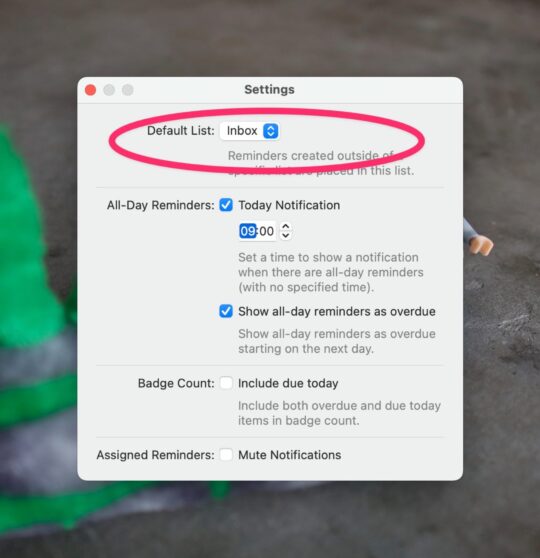
On iOS you need to go to the Settings app and then choose Reminders. Now you can choose the default list.

macOS
One of the biggest drawbacks to Reminders on macOS is that Reminders doesn’t have a default Quick Entry method that you can trigger from a keyboard command. Every other task manager I’ve used does this in some fashion. Later on I’ll talk about some ways to work around this problem.
For now, select your default list and then press ⌘ N to create a new task. Reminders will create a new task and you can set the task title, notes, date, location, tags and priority by selecting the appropriate spot in the interface.
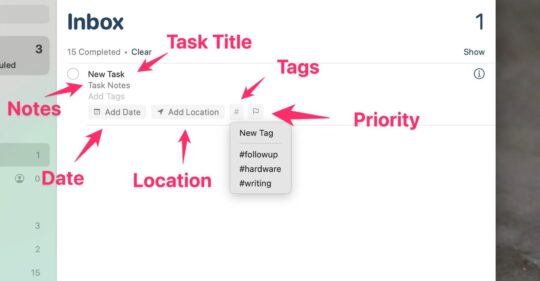
Under the i icon on the right side you can also set more parameters for a task, like attaching a photo or a URL to the task.
But clicking around the Reminders interface is the slow way to add a task. You can also use the task title field to set a bunch of the parameters for a task. If you write take out the garbage tomorrow at 9am #chore then you’ll see that Reminders gives you some popup interface elements to select the due date and time for a task along with setting the tags for the task.

If you click the i icon now you’ll notice that the #chore tag does not show up in the tag field, though it does show in the Tag filters on the bottom left side of the Reminders interface.

iOS/iPadOS
On iOS/iPadOS you get some other nice options to make adding task faster. If you long press on the Reminders icon you will be given the option to add a task to some of your lists. When you choose one of those lists you’ll be taken directly to the list with the new task interface ready to go.

From inside Reminders, you can add a new Reminder by choosing New Reminder in the bottom left side of the application.
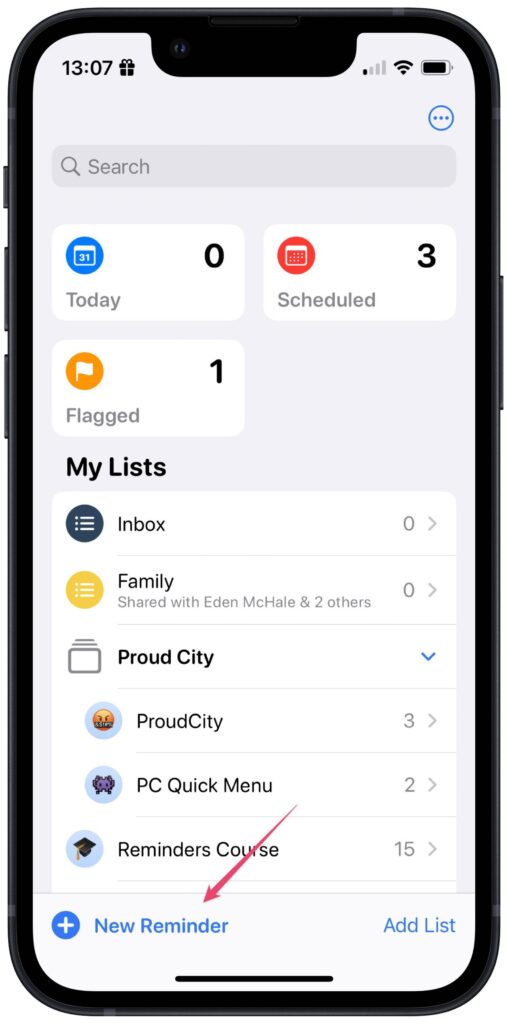
If you’re inside a specific list already then the new Reminder will be added to that list. If you’re viewing all your lists then the new Reminder will be added to your default list. On youre iPhone you’ll have two different screens to add a task. First, you can add the task title, task notes, and set the list that your task will go into.
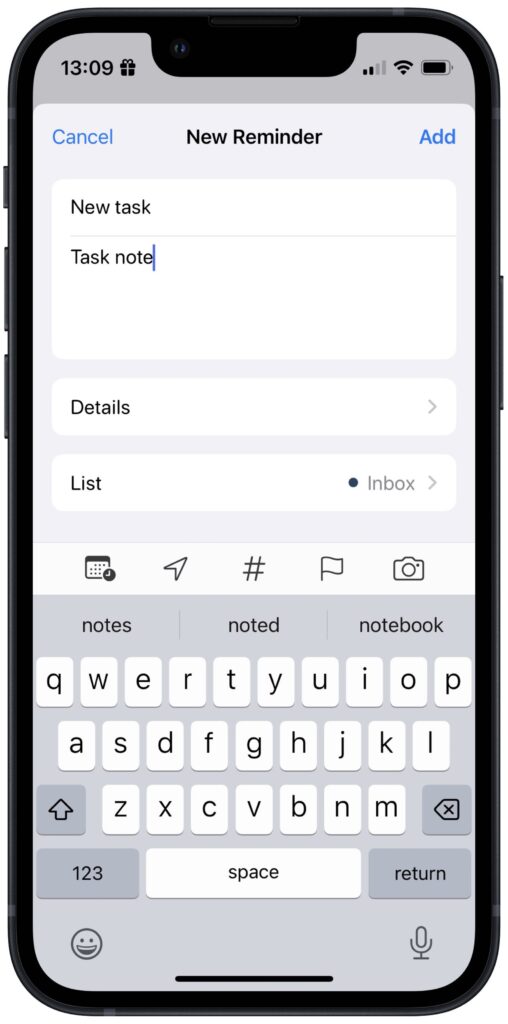
Second, if you touch the Details option you can set the date, time, tags, location, flags, and priority of your task. You can also set the task to show up in Messages when you’re messaging someone or add an image or URL to the task.
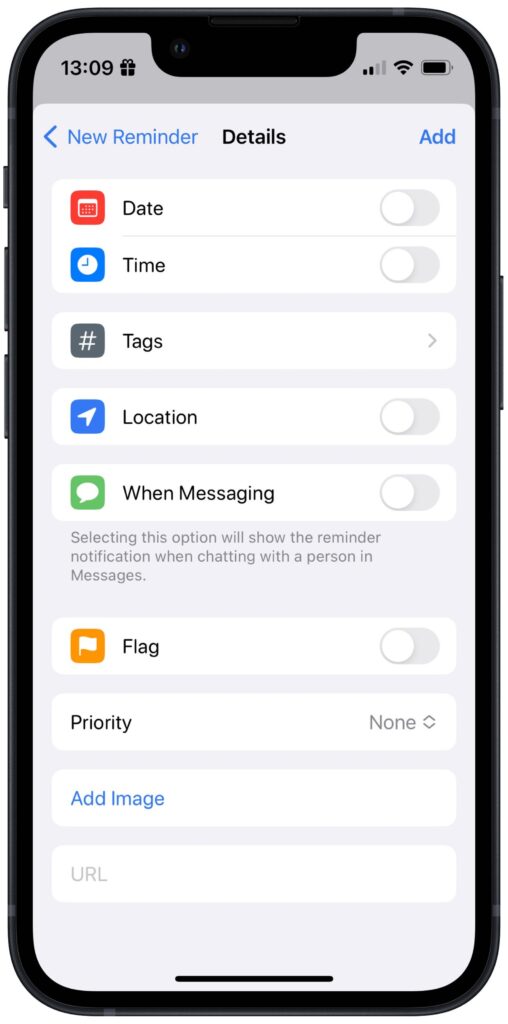
Location based Reminders will alert you on your device when you’re near a location. You will need to have your notifications set so that Reminders is allowed to send you notifications for this to work.
Just like macOS, you can use natural language to set the date for a task as well as adding tags to your task without needing to navigate to the Details screen on your iPhone.
I didn’t cover the iPad interface specifically because it looks and works exactly like the macOS interface, with the exception of the long press options on the icon.
Share Sheet
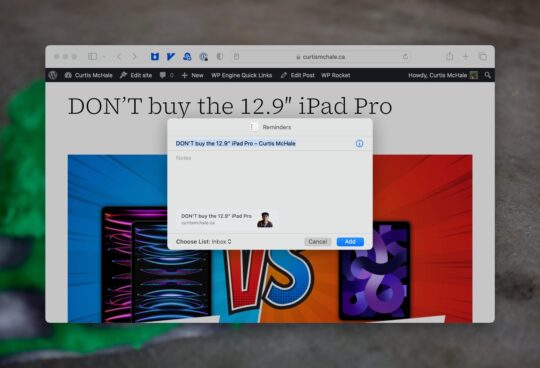
One final excellent way to get rich data into your tasks is with the Share Sheet. On macOS select the Share Sheet from the top right side of Safari. Then select Reminders from the options presented.
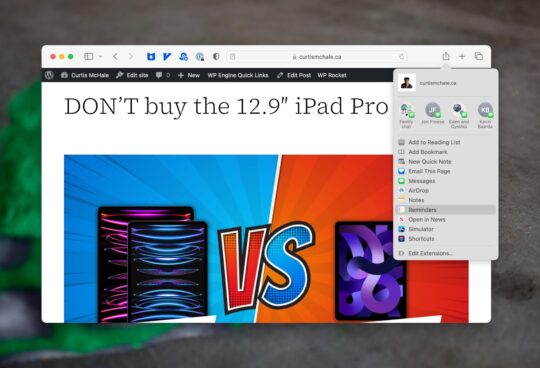
Next you’ll see a dialogue to add a task title, note, and choose which list the task will go into. You can use natural language to add a tag here, but the date based features of the task title do not work from the Share Sheet in Reminders on macOS.
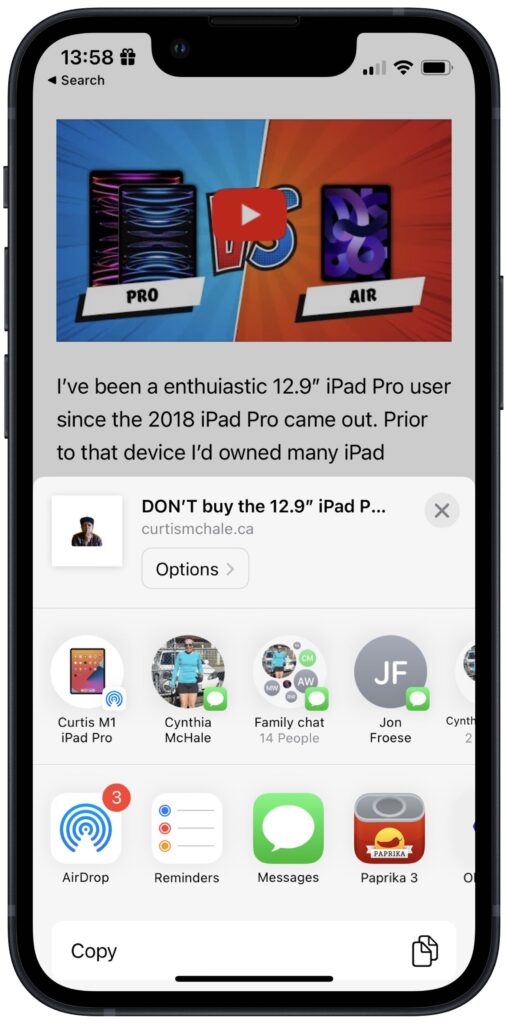
On iOS you can use the Share Sheet in Safari by selecting it from the bottom middle of the Safari window.
Next you select Reminders from the Share Sheet options.
If Reminders isn’t an option scroll all the way to the right and press the three dots. Then you can scroll and add Reminders as a permanent option for your Share Sheet.
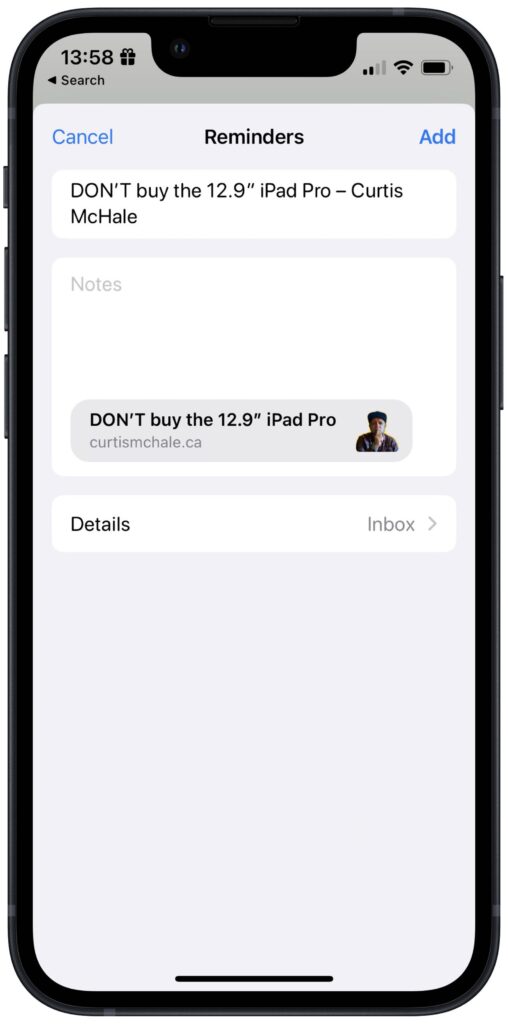
Finally you’ll be presented with the dialogue to add the task title, task notes, and choose which list your Reminder will go into.
To edit your task further on iOS you’ll need to open the task up in Reminders and select it for editing.
For almost any application you’re using on iOS you can access the Share Sheet. Many of the applications even import some rich content snippets when you send tasks to Reminders via the Share Sheet. For example, Apple Notes will provide a link to your note in Reminders and display the title of the note. This can make it easy to identify which task you’re dealing with.
Maximize Apple Reminders
Reminders comes default on all Apple devices and is an excellent task manager. By the end of this course you’ll be a Reminders wizard able to quickly manage your tasks and get stuff done. You can also become a member to get all my courses.
$49 USD (30-day guarantee)