At one point in my life I was collecting Lego sets that I enjoyed, but that time has passed and my Lego remains in a box after my move to Prince George almost 2 years ago. The Lego hobby has been replaced in a small way by getting interesting keyboards now and that is why the 8BitDo Retro keyboard came into my life. It appealed to the nostalgia I have for my first days with the original Nintendo Entertainment System.
Hours of my childhood were spent playing Mario, Duck Hunt, some boomerang game I don’t remember now, various versions of MegaMan…and numerous other games that migrated through my house after picking them up from Blockbuster.
Yes I simply saw the image of the 8BitDo keyboard and bought it. I knew they made decent stuff as I have one of their controllers for my Steamdeck, so that was good enough for me. Now, lets dive into the keyboard I purchased has any more value to me than mere nonstalgia.
What I Got
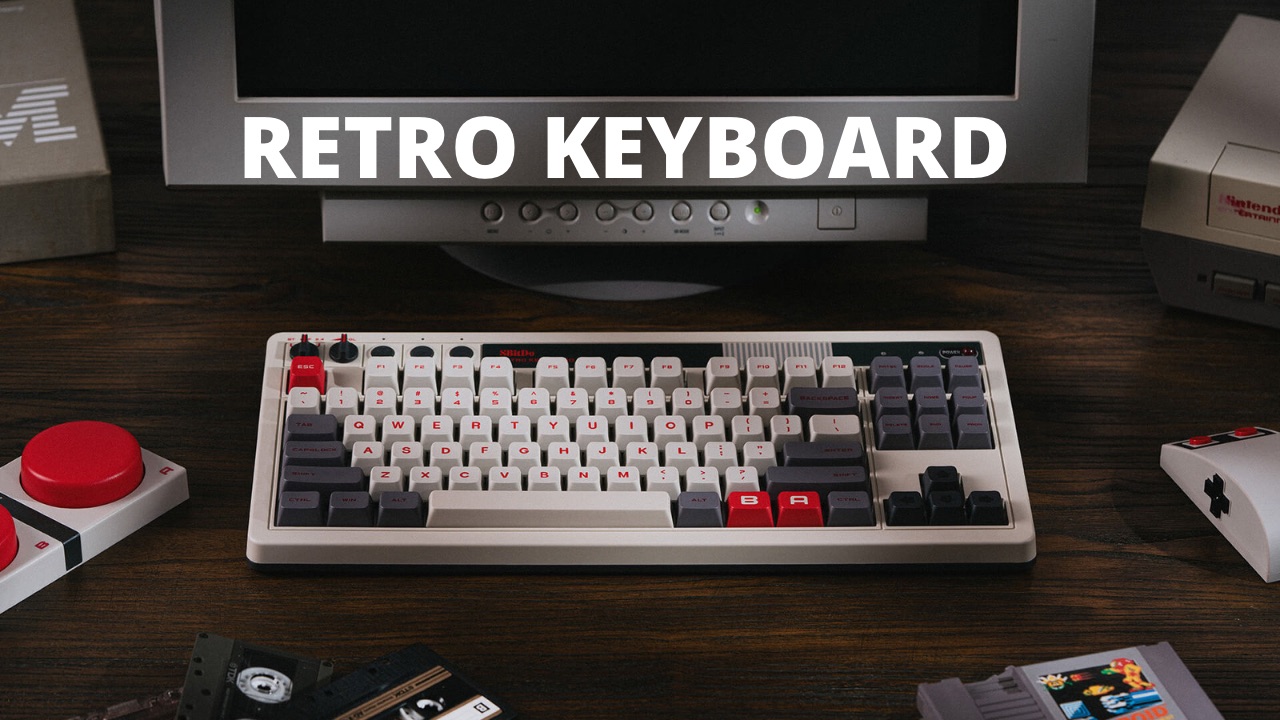
The 8BitDo Retro keyboard comes in two variations. One for NES fans and one for Famicon fans[1]. Either option comes with Kailh Box White V2 switches and are hot swappable for other compatible switches. The keycaps are dye-sublimated PBT, which means they’ll last a long time before getting shiny.
But outside the obvious looks of the keyboard the coolest parts were the extra A and B buttons that are external to the keyboard and can be programmed. We’ll cover how to program the various extra buttons in a bit.
Officially the keyboard is only compatible with Windows and Android. For us Linux/macOS/iPadOS keyboard users that means our function keys are in the wrong spot, but the keyboard still works in that it types all the letters you expect it to type. The volume knob even works to change the volume on your devices.
Connections
The 8BitDo Retro keyboard comes with three methods of connection. First, and the way I’ve used it most, is connection via USB C.
Second you can use a 2.4Ghz dongle that’s hidden in the base of the keyboard. I tested mine and it worked. I assume that they’re using the same connection method as they use for their controller which sports the same dongle and has always been rock solid.
Finally you can connect the keyboard to your devices with Bluetooth. Unlike many keyboards though the 8BitDo keyboard appears to only have one Bluetooth profile, which means once you set this up with a single device that’s the device that the keyboard will be using unless you forget the pairing and repair it with a new device. When connected via Bluetooth on iPadOS the device does report its battery level to the system.
One other issues with the Bluetooth connection on this keyboard is that it seems slower to wake up than some of my other keyboards. I’ve had my iPad miss that there is a keyboard connected to my iPad when I used the Bluetooth connection. This means that my iPad goes into display mirroring mode and I have to dig into Settings to get my external monitor to work as expected. This doesn’t happen with my Mojo68, so that appear to be a problem with the 8BitDo Retro keyboard only. It’s a minor gripe, but boy is it annoying if you want to use Bluetooth as your connection.
I choose a wired connection unless I’m writing a review though, so in my day to day usage when I wasn’t testing Bluetooth, this isn’t a problem.
Battery Life
This keyboard has a 200mAh battery which they say takes 4 hours to charge and and provides 200 hours of use. I charged the board for the first day I had it and have used it as my main iPad keyboard for 3 weeks. The battery still has plenty of batter left in it and since it’s a desk bound keyboard due to it’s size, I really don’t see the issue with plugging it in every week or two to fill it back up.
Programming the Keyboard
There are a few ways that the keyboard can be programmed. You get the most flexibility out of the Ultimate Software V2, but unfortunately it only runs on Windows. I don’t have any Windows computers in my house so I never got to try the software. This means that I’m stuck with the ⌘ and ⌥ in the wrong spot for my device. I can adapt, but even two weeks in I’m finding that I press the wrong key.
Now that I’m about done with the keyboard, I’ll have to unlearn the layout and go back to the expected placement of these keys.
While you can theoretically still program the keys for this keyboard, including the larger A/B buttons, I spent 30 minutes trying to get them to work and never was able to get any of the key combinations working. I even watched videos on other people programming them, but remained unsuccessful.
I did not see anyone trying to program them for iPadOS though, so it’s possible that the “unsupported” platform means that they simply don’t work and that if you’re on macOS or Windows they’ll work fine. I certainly did see many YouTube channels get all the A/B buttons working under macOS without issues.
In theory you press the Star key and it will start flashing. Then you press the key combination you want to automate and finish by pressing the A/B key that you want to assign the key combination to. While all the lights on the keyboard worked as expected, the keys never did anything for me.
Should You Purchase the 8BitDo Retro Keyboard?
Despite my lack of love for the keyboard, I don’t regret the purchase. I love the retro vibes of the keyboard and you can expect to see it in the background of my videos going forward. I purchased the keyboard purely on it’s looks without doing any research into the functions or how it would support iPadOS.
If you’re on Windows and can take advantage of the programmable nature of this board and you like traditional sized keyboards, the by all mean the keys feel great and I like typing on it. I just wish that it supported iPadOS better.
As for me, I’ll likely purchase the ZSA Voyager in the next few weeks to complete my iPad desk setup with an ergonomic typing option.
This is my typing stuff for a video. If you can see what I’m typing and tell me the sentence then I’ll have a prize for you. Did you figure it out yet? Would it help if I told you that I type DVORAK?
- [1] The Famicon came out first in Japan and then was brought to North America as the Nintendo.

Stay Organized with Things 3
Things 3 is my favourite iOS, iPadOS, macOS task manager. It combines the right mix of organization without all the nags that some task managers have when you get a bit behind. By the time you finish this course you’ll be a master of Things 3. You can also become a member to get all my courses.
$49 USD (30-day guarantee)
